
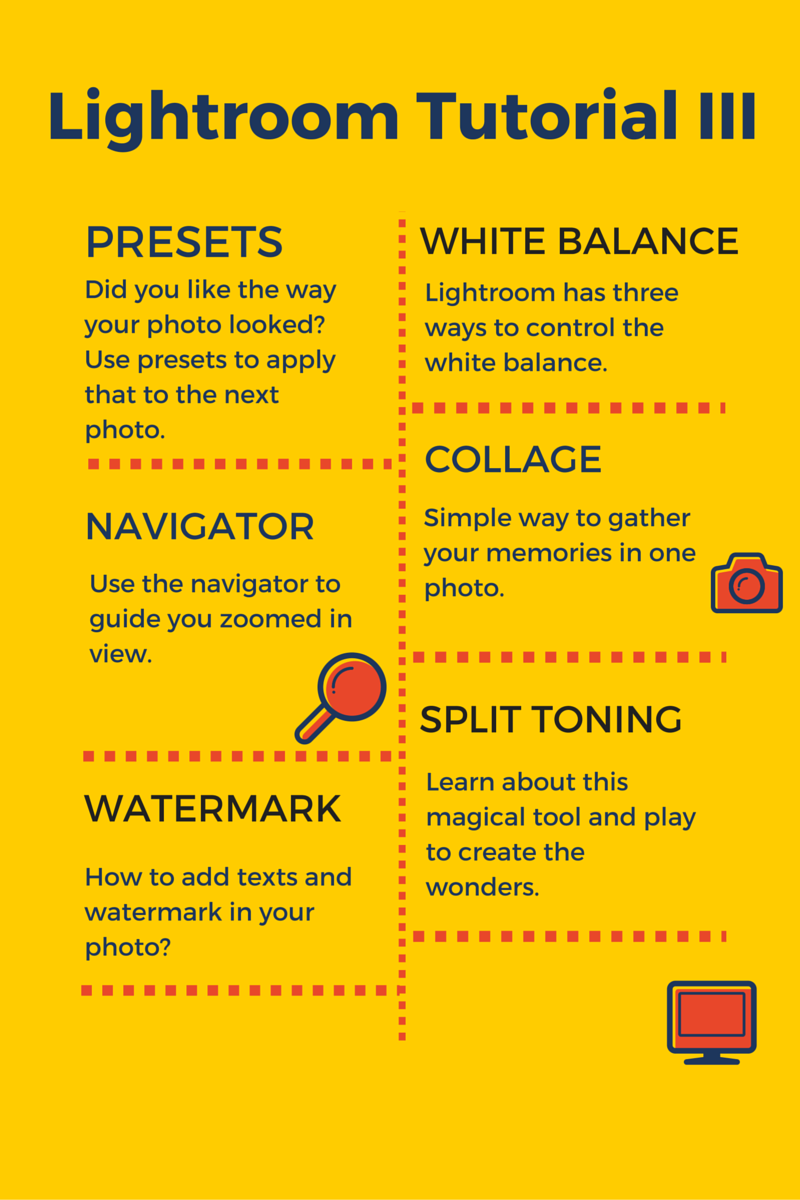
This is the third tutorial of the Lightroom series. We are learning 7 things today. Through out my entire course, I mentioned to use Canva as an alternate to some LR work – such as collage, adding text. It’s quite simple to use, requires no installation and it’s FREE.
So let start learning, shall we?
PRESETS
This is the most striking but simple to implement feature of Lightroom.
Let say, you’re editing a batch of pictures and you want them to have a similar look and feel. Or you’re editing your photo and you say “WHOA, I am Da Vinci. I wish I could add the similar effect to my other photos”. Presets is your answer. You can save presets and apply that preset to other photos of your choice. You can name them the any way you want.
There are thousands of presets (some paid and some free) available, however I strongly recommend you make your own preset and do not spend $$$ buying. There is a plugin known as Nik Collection (FREE) from Google which I use. However I have not tried Nik Collection with LR.
[ezcol_1half]
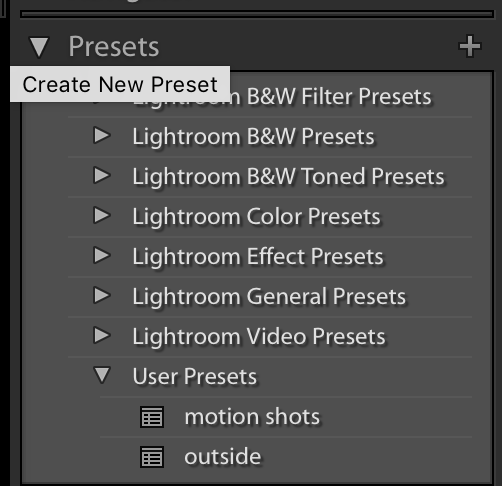
- When you’re in Develop Module, You can see the presets on the left. After you’re done editing your photo you can click the ‘+’ sign on the right. That will take you to another window.
[/ezcol_1half] [ezcol_1half_end]
[/ezcol_1half_end][ezcol_1half]
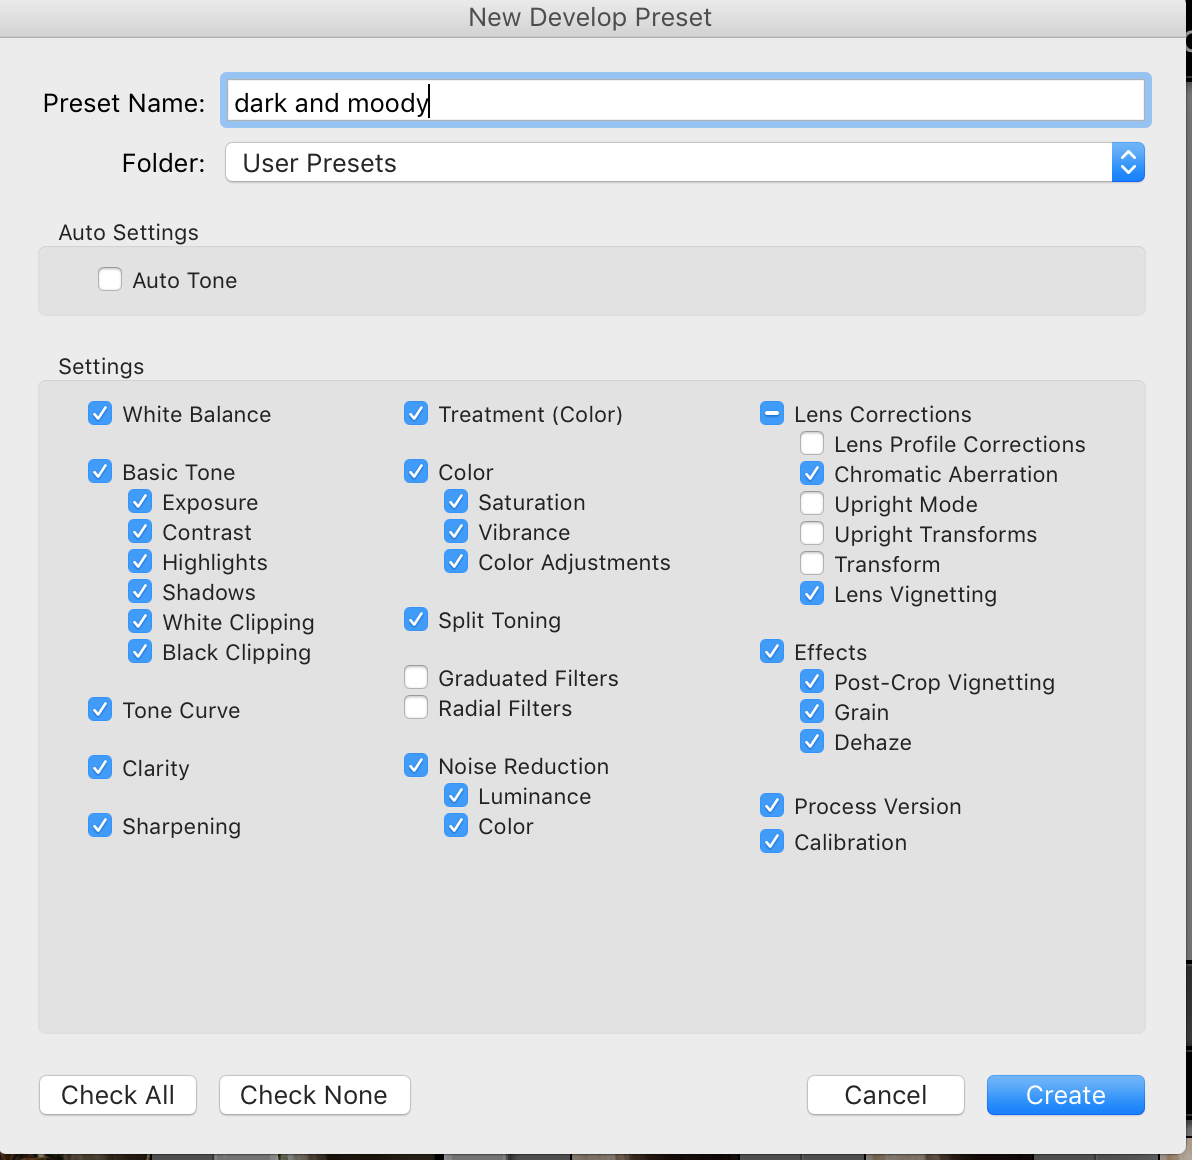
2. Now this window helps you to create your new preset. Don’t get intimidated by too many check boxes. While clicking the check boxes, you just make sure which settings you’re saving as presets. If you’re unsure you can check all.
[/ezcol_1half] [ezcol_1half_end]
 [/ezcol_1half_end]
3. Now select another photo and click that preset you just made. You will get your desired look and feel. Presets are quite useful when you’re editing in batch.
NAVIGATOR
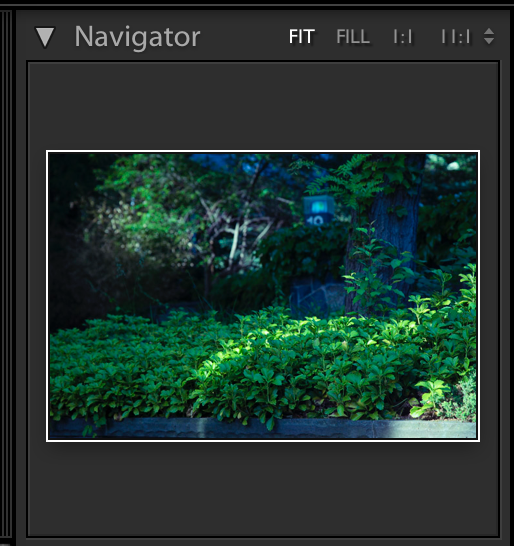
Navigator is nothing but the small preview of the selected image.
But it’s quite powerful for zoom-in and zoom-out features. I was unaware about this feature until a few days back. When I am using adjusting brush I prefer to get down into intricate details. In order to do so, first you need to zoom in, and then use the navigator to select the area you want to edit. After that, mask that particular area. This tool actually helps me to get extremely close with the subject and use adjustment brush quite effectively.
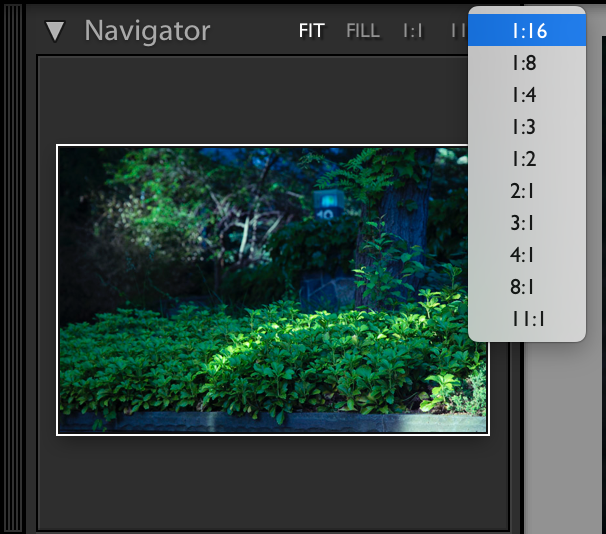
The Navigator panel looks like this. When you’ll start clicking you will understand what FIT, FULL, 1:11, 11:1 and the drop down means. You can see how much you can zoom into your photograph.
[ezcol_1half]
 [/ezcol_1half] [ezcol_1half_end]
[/ezcol_1half_end]
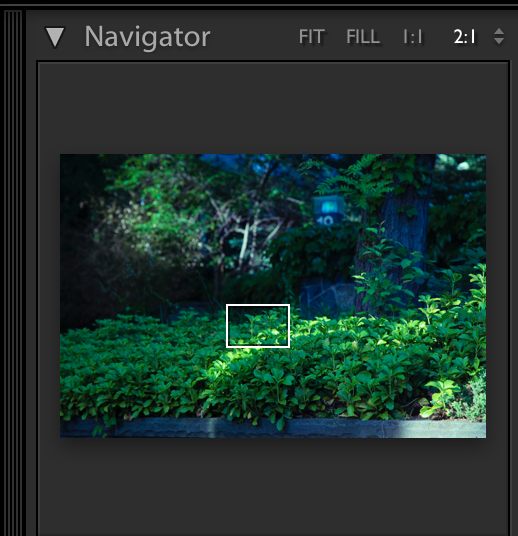
This is a 2:1 zoom view and look the main picture below how much it can zoom. This zoom view helps you to clean up based on your requirement. You can mask that area selecting your adjustment brush and do as required. In my previous tutorials I have explained adjustment brush, but it can be broken into one entire tutorial. Again, remember you can drag that small window wherever you want.
[ezcol_1half]
 [/ezcol_1half] [ezcol_1half_end]

[/ezcol_1half_end]
WATERMARK/ADDING TEXT

For some of us, adding text is quite important. As I mentioned several times before, I prefer Canva over LR for adding texts as it gives me flexibility. However, I still use Lightroom for adding watermark to my posts.
[ezcol_1half]
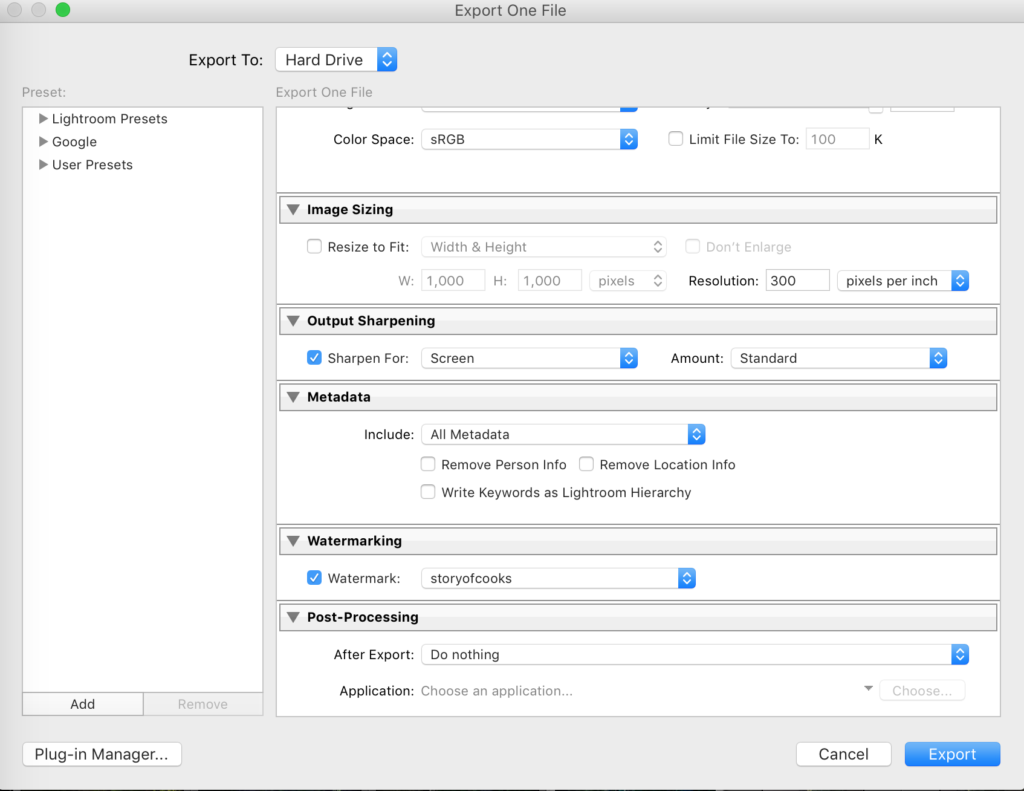
- Adding watermark is quite simple. Upon Clicking Export Button (under Files) you will see a window like this. In that window when you scroll down you will find a tab called watermarking, like shown here.
[/ezcol_1half] [ezcol_1half_end]
[/ezcol_1half_end][ezcol_1half]
[/ezcol_1half] [ezcol_1half_end]
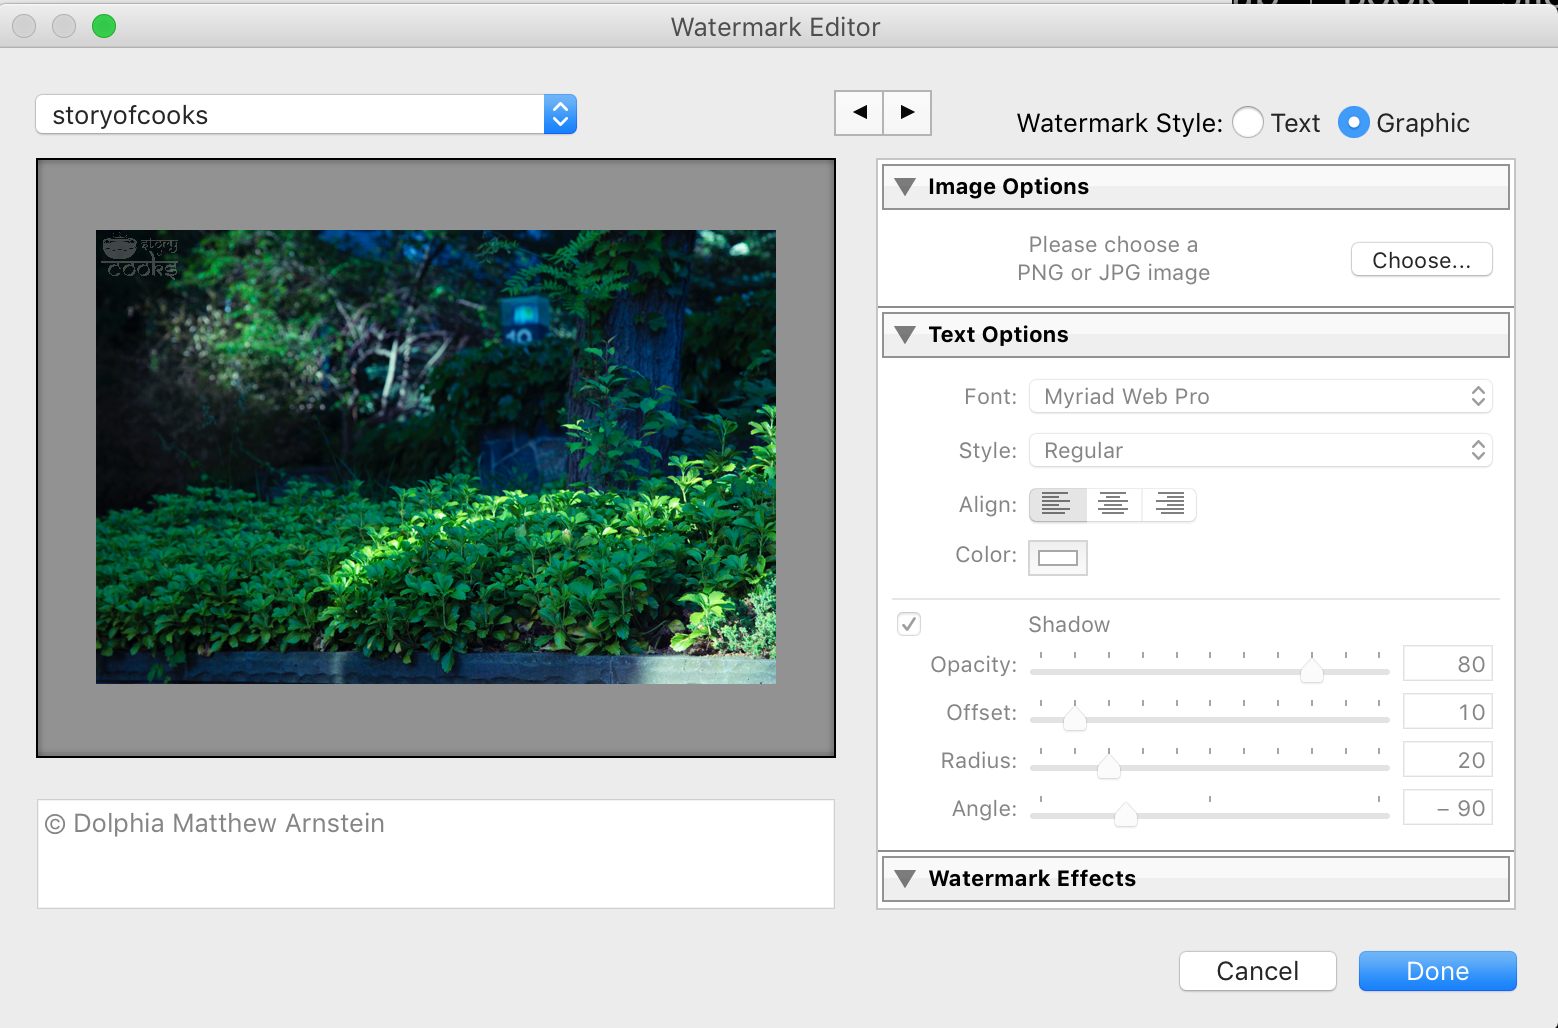
2. When you click on that tab, there is an option called “Edit Watermarks”. Clicking that will take you to another window like this. Here you can find many options like, adding a graphic/text and select whatever effect suits your text. Mostly I prefer to use my logo as watermark/but it’s up to you. But let me remind you you can only add watermarks in certain places.
[/ezcol_1half_end]
Only places you can add watermark are these places.

COLLAGE
Location: Print module of Lightroom.
Left Panel:
[ezcol_1half]
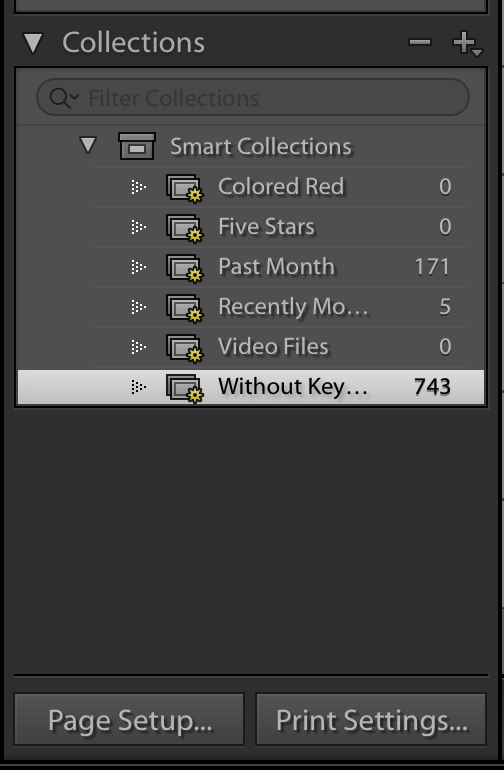
Smart Collections:
- You need to select the desired photos that you want to make a collage. My photos are under “Without Keywords” but this is not the most efficient way. You can create a collection of collage photos and selecting that will show you the photos in bottom tab. You can check my previous post How photos are stored in Lightroom?
[/ezcol_1half] [ezcol_1half_end]
[/ezcol_1half_end][ezcol_1half]
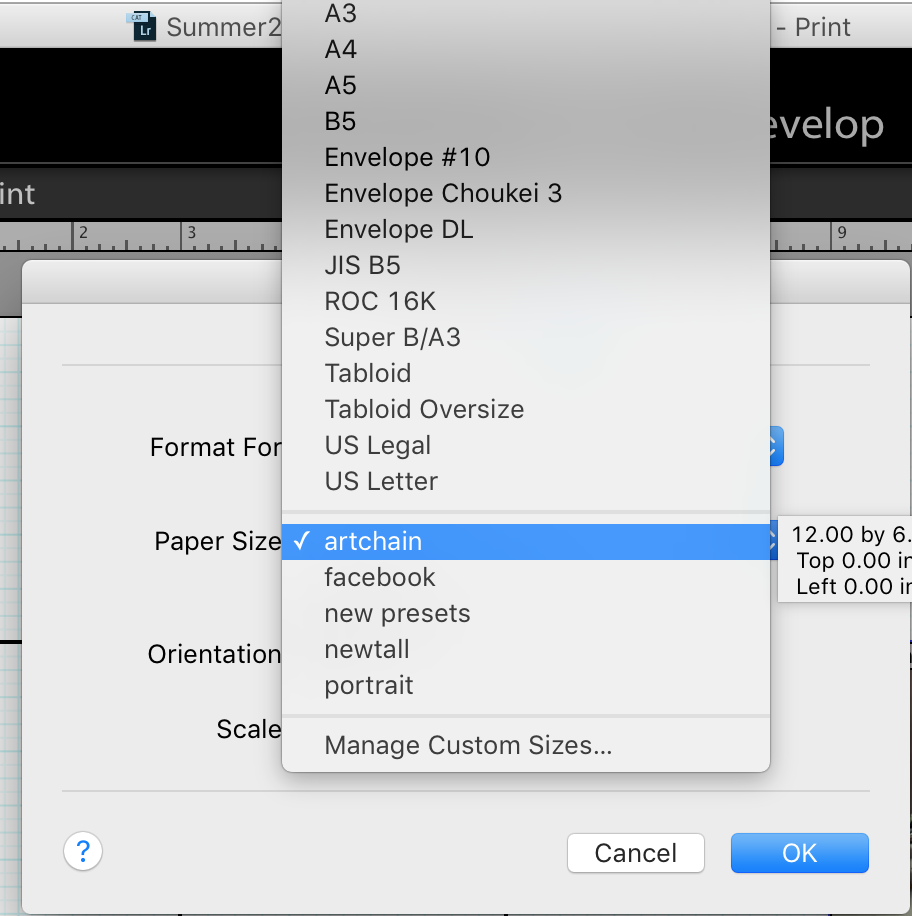
Page Setup
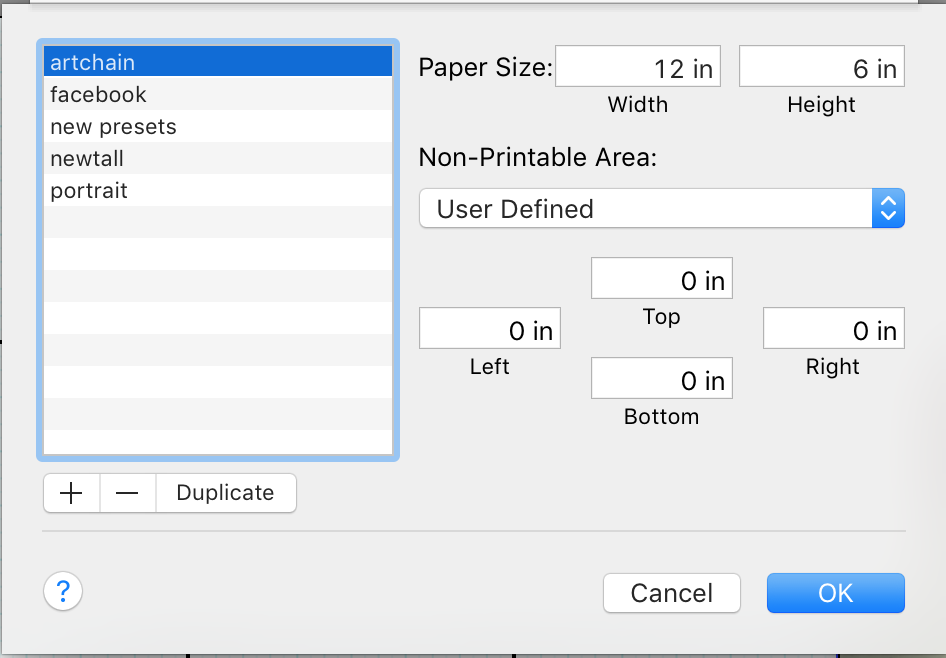
- Selecting that will take you to a new window which will prompt you to select the paper size. Lightroom has some in built paper size, which is fine to select. But you will need custom sizes in order to meet your requirement.
- In paper size, at the bottom you’ll find Manage Custom Sizes. Click that and that will open another window where you can specify height and width.
- Click on the plus sign to create a new layout, don’t forget to rename it.
- Click on the height and width and specify your desired height and width.
- You’ve an option to keep a margin, put values in left, right, top and bottom. Otherwise leave with 0 and hit ok.
- After hitting okay you will see your paper size is selected with that.
You need to learn inches not pixels of your page size.
[/ezcol_1half] [ezcol_1half_end]
[/ezcol_1half_end]
Right Panel
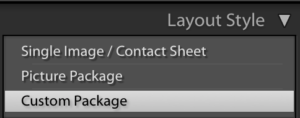
- Layout Style: Select Custom Package.
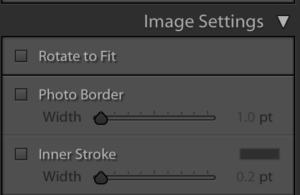
2. Image Settings: which you can skip unless you want a picture Border. I uncheck the Rotate to Fit, but you can check it if you need.
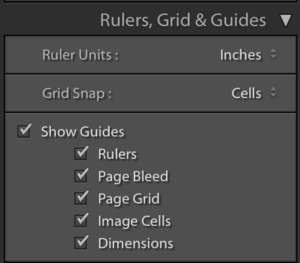
3. Ruler, Grid and Guides. I click on show Guides as it helps me to see the page.
4. Cells: You can specify the height and width of your individual photo which means the cell they are in.
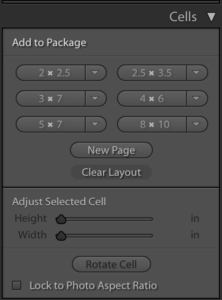
5. Page: You can add watermarks. If you click on Identity plate, you can create the watermark for the whole picture. If you select watermarking, you will add watermark to individual photos.
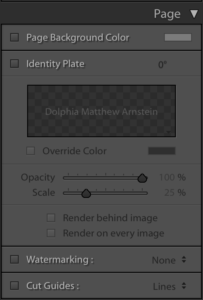
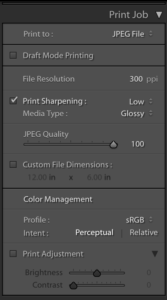
6. Print Job: You need to select Print to JPEG file. When you select that it will print to file.
Now drag photos in your collage, create collage, add text and export! You see creating a collage with Lightroom is a bit of work. Which is why I mentioned to use Canva as it’s much simpler to use.
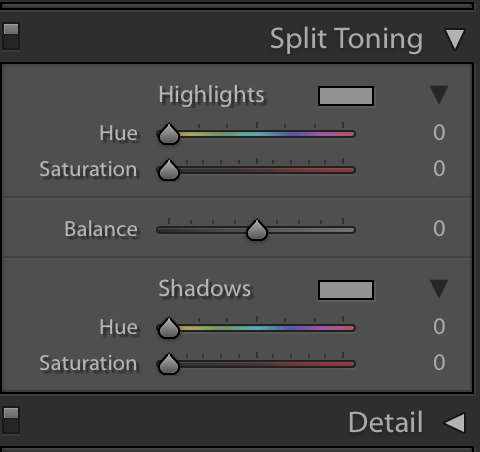
SPLIT TONING
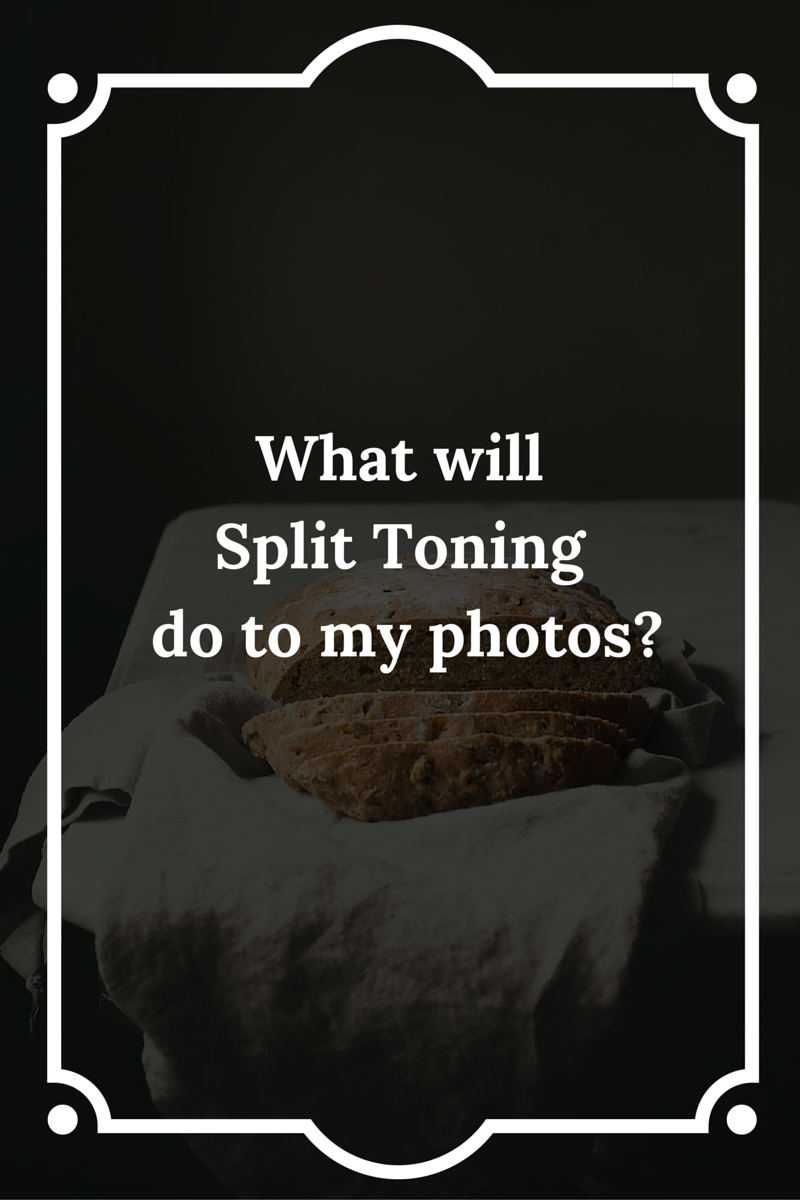
I learnt about this feature only a few days back. When you’re in develop module scroll down in the right panel. Did you find Split Toning?
I am not going to write what split toning you should apply, but I will explain how this tool works.
There are two things here : Highlights and Shadows. In every photo there is an area(s) of highlight and there will be an area(s) of shadow. Split toning helps you choose color tone of those area(s).
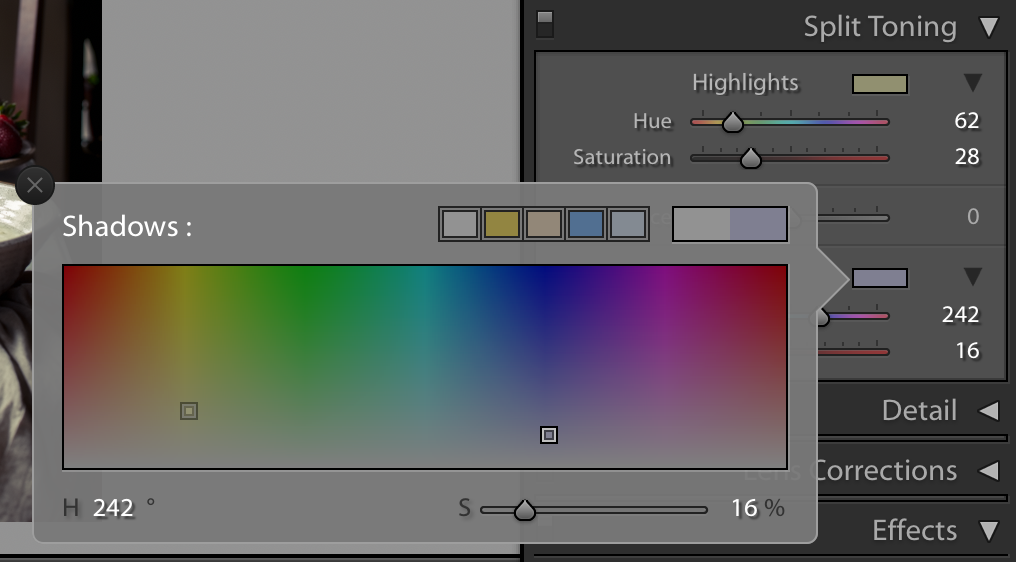
Let say I want my shadows to be cold/blueish tone and highlight to be warm/yellowish. Upon clicking that small rectangle next to the “Highlights/Shadow” you will get a window like this. It will come with an eye dropper tool which will help you to move around and select your desired tone.
I am not going to tell you what kind of Split Toning you should use for your photos. Because it’s your vision and you will do what you need to do. But, Split Toning is not super easy to get in the first attempt, so if you struggle a bit, that’s quite normal.
But don’t give up! Keep practicing and in no time you will be expert. If you learn to do split toning well, you can see the significant change in your photography and you’ll slowly stop using built in plugins.
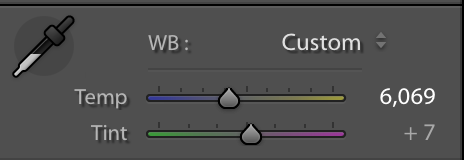
WHITE BALANCE
There are 3 ways you can control the white balance.
- Built in White Balance tool : A great place to start as it helps you to correct the white balance in jiffy.
- Temperature Slider : I use it most of the times as it helps me to cool or warm the photo based on my need.
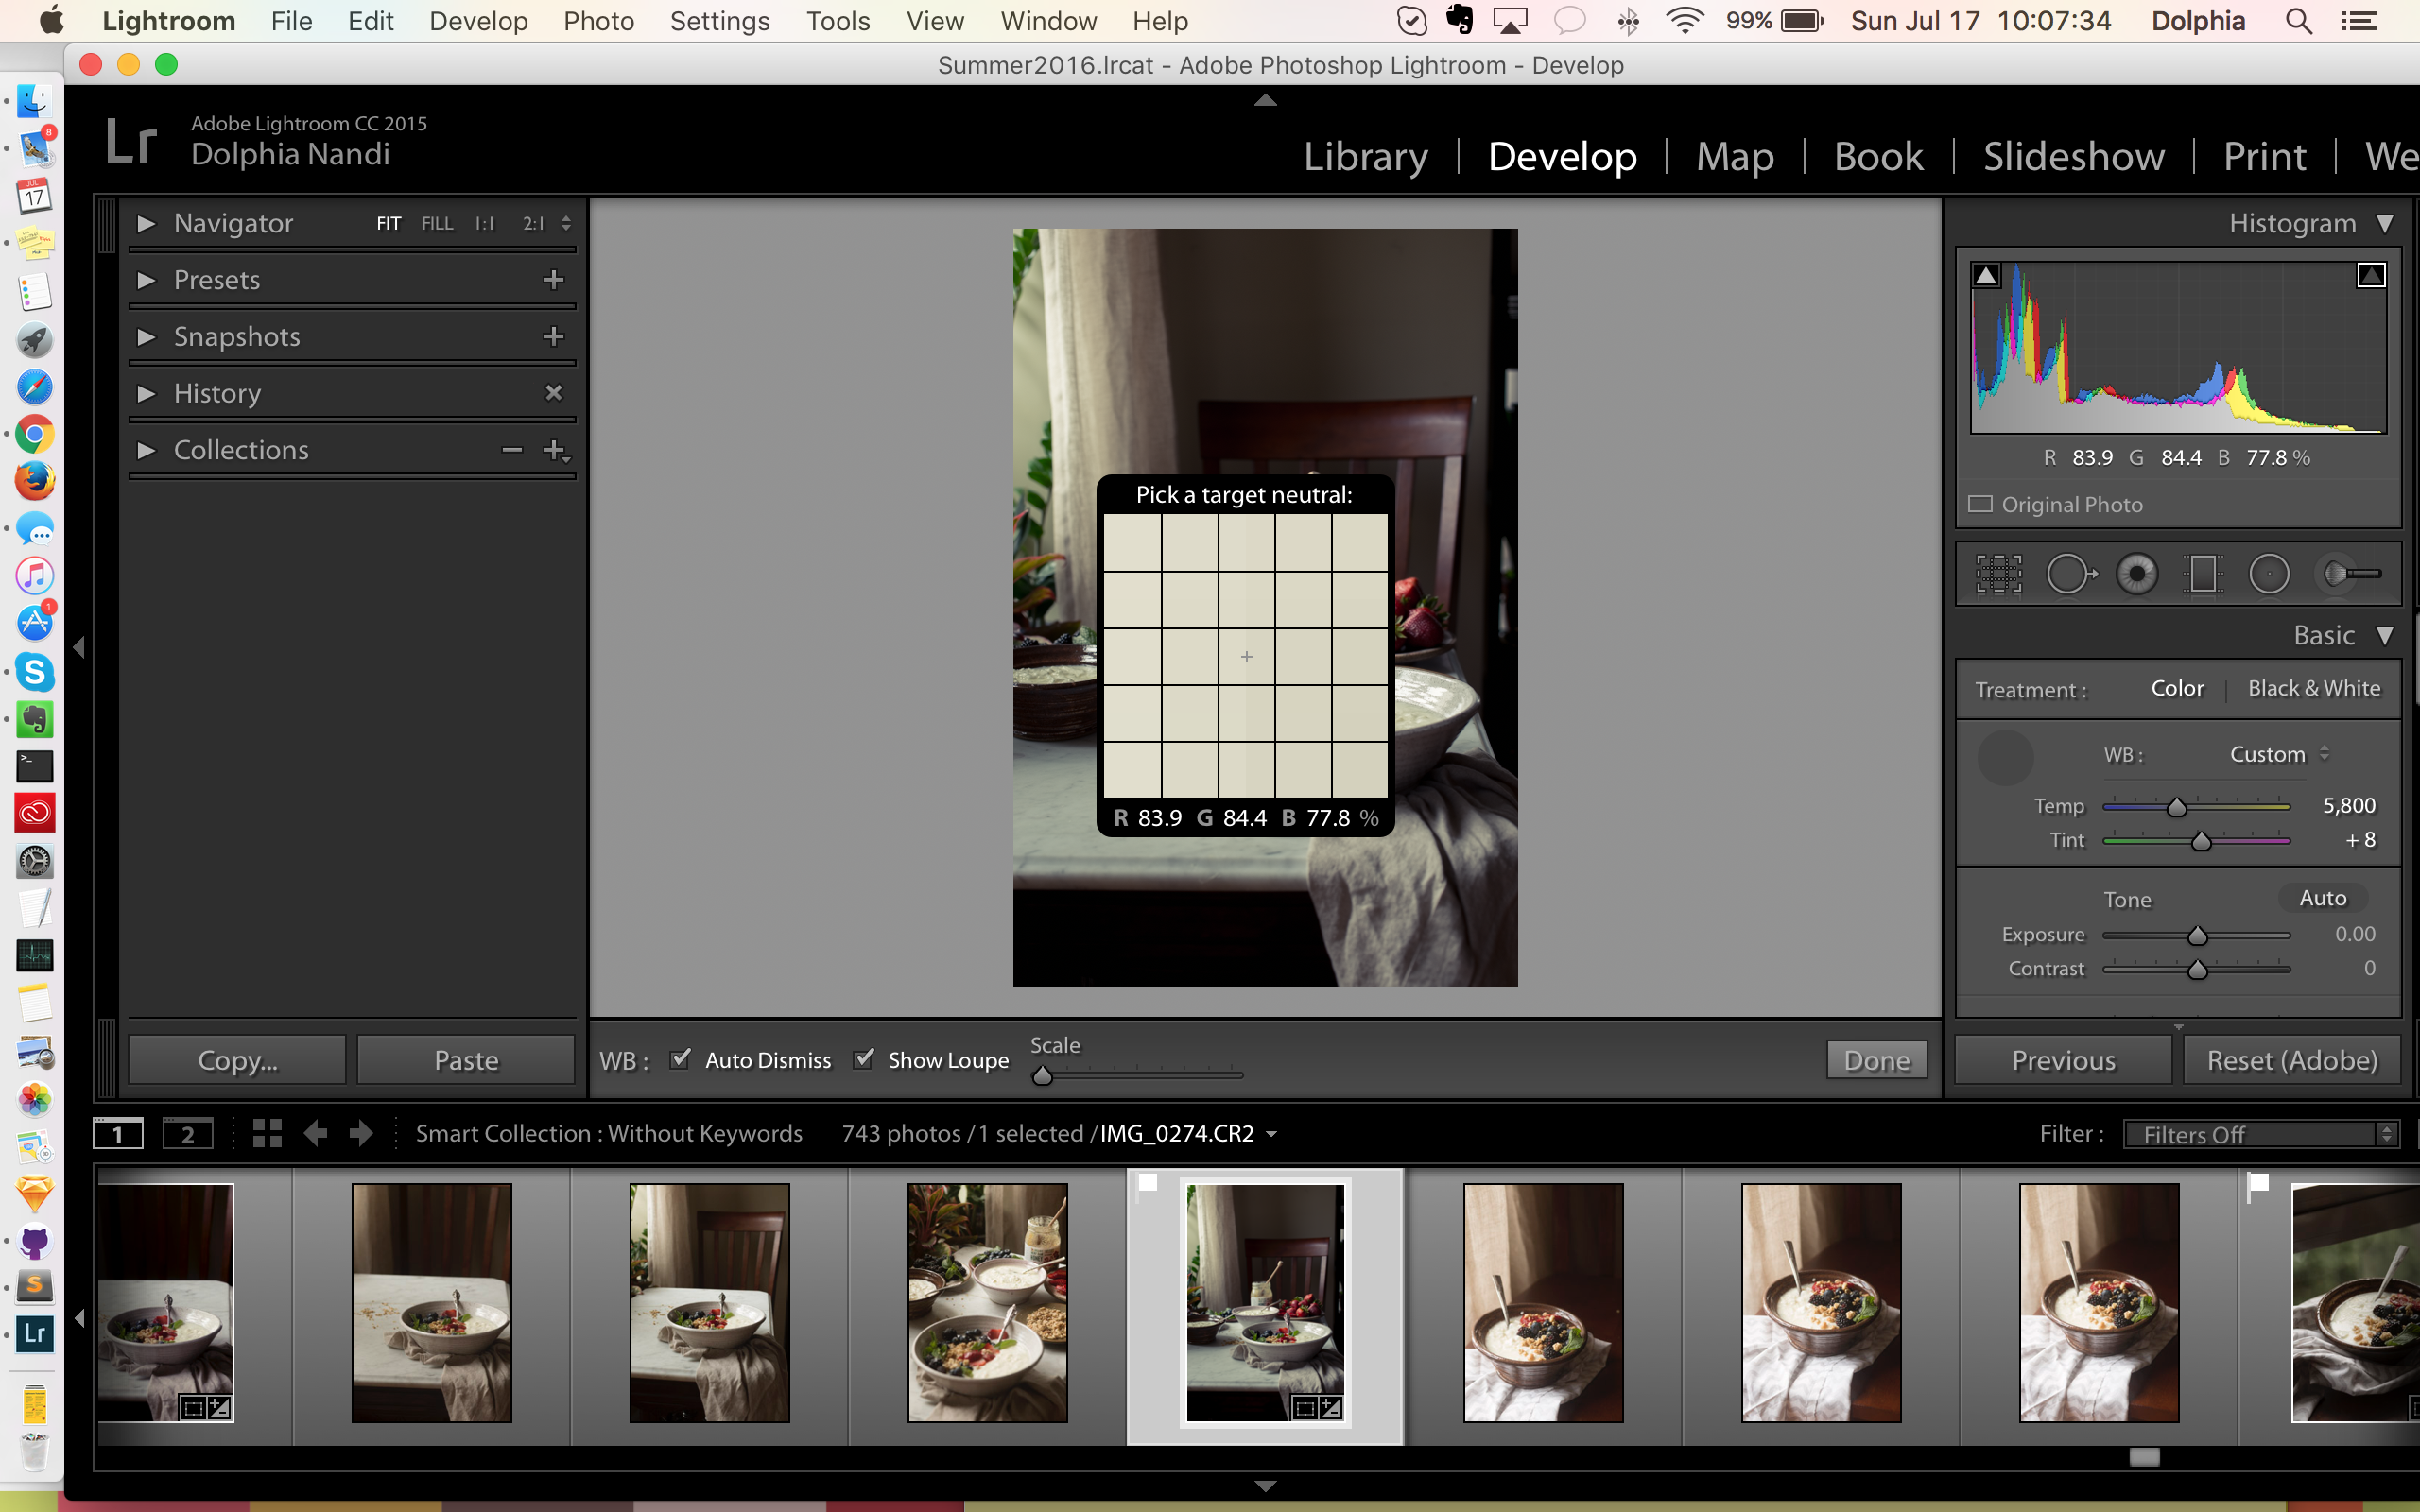
- Eye Dropper : When I am shooting white on white, I use the eye dropper tool as Simi has mentioned in one of her article, you need to check the percentage of Red, Green and Blue and you can only achieve that using this method. However you might need to use the eye dropped tool more than once to correct the white balance. If you’re using this tool, make sure you select an area where the color is gray (neutral-ish)
Two previous tutorials on Lightroom.
1. How to get started with Lightroom?
2. How photos are stored in Lightroom?
I thought of ending the Lightroom series with this, but this post was getting big and I have one last topic to write: adjustment brush, gradient filter, clone tool and crop. Basically, this bar under the histogram.

Very detailed write up. Thanks Dolphia
Very nice post….
You have put all the basics together and explained it well. Nice tutorial Dol
Thanks so much jyo!!
Thanks Amrita
Thanks Rae, hope it helps you.
Very well explained Dolphia.Thanks for the tutorial.
I have to sit with your Lightroom tutorials and try everything out on my laptop. I have downloaded lightroom 6 months back but haven’t had the chance to figure it out till date!
And the new look of the blog is awesome. 🙂
Pritha, start soon!
Excellent Blog.. Went through a couple of them and mighty impressed.. Cheers
Thanks 😉