
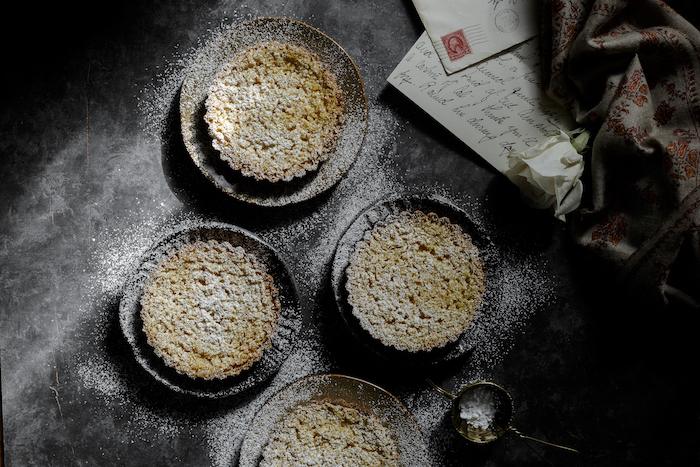
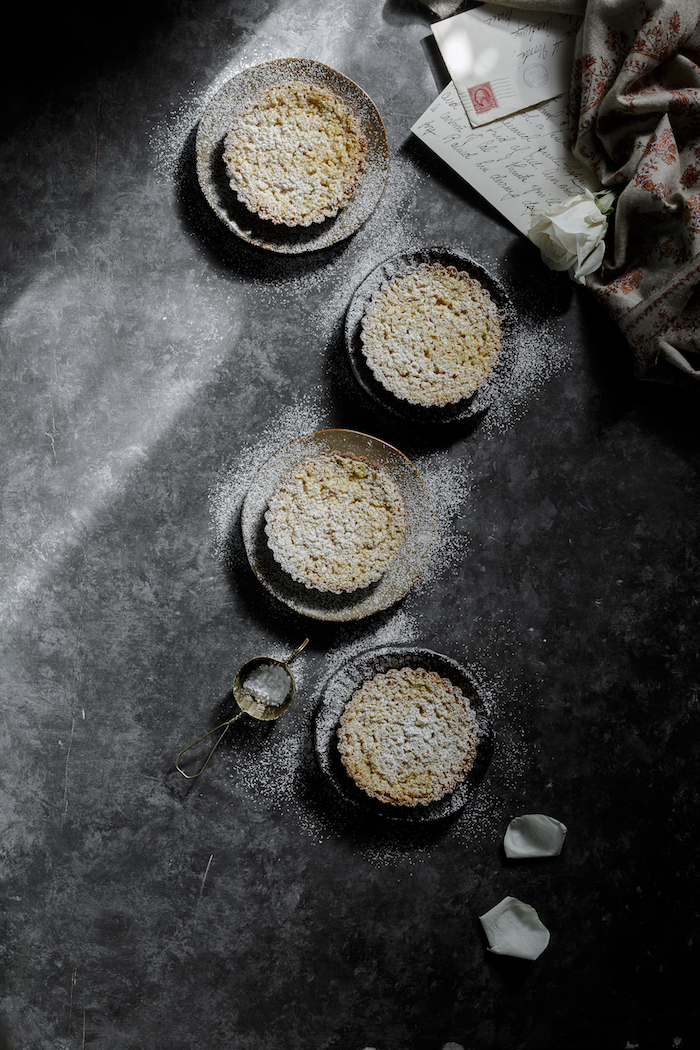
Gluten Free tarts require minimal preparation, yet they look elegant and taste ethereal. How can you not bake these beauties for your valentine?

Chefs and bakers are like two opposite poles of the world.
Chefs can pull together a brilliant meal with a few ingredients without following a recipe. My mom is one such. Then there are bakers. They measure everything and follow a recipe word by word and my mother in law is one of them. It’s hard to be good at both. In my opinion, cooking is much simpler than baking as you can alter the taste of the dish while it’s getting cooked. But baking is not like that. Everything must be perfect before the dish enters the oven and once it’s baked, you can’t fix the errors. So, baking requires proper measurements, temperature and a tried and tested recipe.
My husband is an ardent tart and pie lover so this year I decided to hone my baking skills and bake a ton of pie, tart, galletes.
I grew up in India where tart and pies are known as ‘Fancy Foreign Desserts’ which are not easily available. It might be famous to Indian blogging world but you won’t hear pie and tart in regular Indian households. In a nutshell, I don’t come from a pie and tart culture. First time I had apple pie in 2014 at my mother in law’s home in New York. The year after that I tried to make apple pie at home. After a few disastrous attempts, I got it correct. You can find the recipe – here.
We are celebrating Matthew’s birthday and our 3rd anniversary this week and next week. So, I decided to bake a few of Matthew’s favorite tarts with gluten free Crust so I can eat them as well.
[ezcol_1half]
 [/ezcol_1half] [ezcol_1half_end]
 [/ezcol_1half_end]
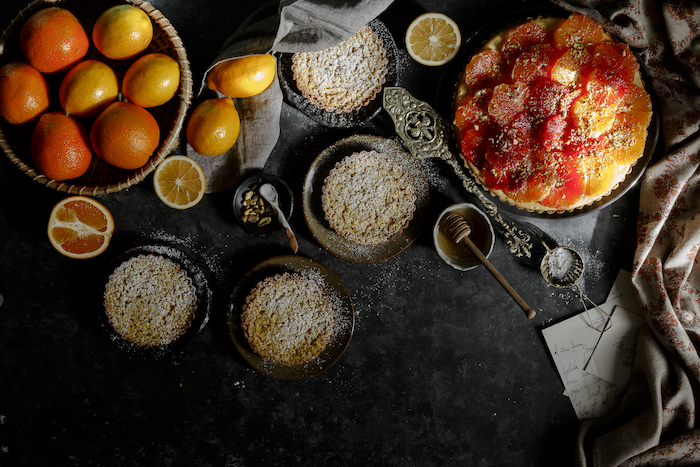
I am not a seasoned baker, but in my opinion Gluten Free Crust tastes much better and they are easier to handle. I made two gluten free tart crust following Bojon Gourmet’s and Cookie and Kate’s recipe. Bojon’s tart recipe is fancy and perfect for special days and gifts. Kate’s recipe is simple and can be used on frequently. I used two fillings – Orange Ricotta and Lemon Curd.
Preparation of these tarts take less than 20 minutes and baking is timed. They are simple and pretty – just like the way I love my desserts.
Gluten Free Tart Crusts
Crust 1 :
This recipe adapted from Bojon’s ‘Alternative Baker‘.
60 gram almond flour
80 gram rice flour
55 gram oat flour
12 gram tapioca flour
50 gram granulated sugar
1/4 teaspoon salt
6 tablespoon butter, cold and diced
1 vanilla bean, scraped
- Have on hand a 9-inch French tart pan with a removable base. Set the oven at 375 degrees.
- In a stand mixer add everything and pulse for 4 to 5 minutes in medium-low speed or until it starts to form crumble. Pour the mixture into the tart pan.
- Starting from edge continue to build the tart by pressing it continuously with hands. It will take about 8 to 10 minutes to make a pretty tart base. With a fork make a few designs.
- Chill the crust in refrigerator for 30 minutes or until it’s firm. Take it out and bake on a baking sheet or pizza stone for 25 to 28 minutes or until it’s golden brown.
- Take it aside. When it’s hot with back of a spoon press the sides and bottom. It helps to hold the shape better.
Crust 2:
I followed Cookie + Kate’s recipe.
135 grams almond flour
135 grams oat flour
1/4 teaspoon salt
1/4 cup melted coconut oil
3 tablespoons maple syrup
- Have on hand a 9-inch French tart pan with a removable base. Set the oven at 350 degrees.
- In a stand mixer add everything and pulse for 4 to 5 minutes in medium-low speed or until it starts to form crumble. Pour the mixture into the tart pan.
- Starting from edge continue to build the tart by pressing it continuously with hands. It will take about 8 to 10 minutes to make a pretty tart base. With a fork make a few designs.
- Chill the crust in refrigerator for 30 minutes or until it’s firm. Take it out and bake on a baking sheet or pizza stone for 10 to 12 minutes or until it firm and starts to brown.
- Take it aside. When it’s hot with back of a spoon press the sides and bottom. It helps to hold the shape better.
Fillings
Lemon Curd
I followed Smitten Kitten’s recipe.
1 meyer lemon rinsed and dried
300 grams granulated sugar
1 stick (4 ounces or 115 grams) unsalted butter, cut into chunks
4 large eggs
2 tablespoons cornstarch
1/4 teaspoon table salt
- Set the oven to 350 degrees.
- Cut the lemon in small tiny pieces. Discard the seeds.
- Add lemon slices, sugar, butter. Pulse it until lemon is thoroughly pureed. Add eggs, cornstarch and salt in food processor. Pulse it until it forms a smooth batter.
- Take it aside. Pour that on baked tart crust and bake it for 35 to 40 minutes or until it’s somewhat firm. I wiggled the pan a bit and the tart was slightly wobbly. Cool it for 2 hours to overnight. Serve it chilled.
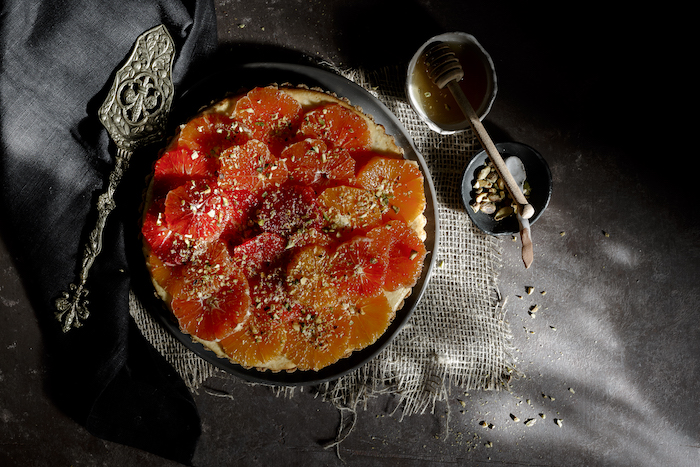
Ricotta Orange
8 ounce cream cheese, softened
1/4 cup sugar
1 tablespoon orange blossom water
Orange zest from 1 orange
15 ounce whole milk ricotta cheese
2 eggs
1 tablespoon milk
1/4 teaspoon salt
1/2 cup orange marmalade
1 cup orange slices for garnish
1 tablespoon chopped pistachio for garnish
- Set the oven to 325 degrees.
- In a large mixing bowl, whisk together cream cheese, sugar, orange blossom water, orange zest, ricotta cheese, egg, milk and salt. Take it aside.
- On the tart shell, pour orange marmalade. With a icing knife spread it smooth. Pour the ricotta cheese batter and smooth the top with the icing knife. Bake it for 40 to 45 minutes or until it’s firm. I wiggled the pan a bit and the tart was slightly wobbly.
- Chill it for 2 hours to overnight. Garnish with orange slices and pistachio.
Entire optional Honey and Orange blossom water syrup
I added 1/2 teaspoon blossom water to the 1 tablespoon honey and made a thick syrup. I poured that over the orange tart and garnished with pistachio.
[ezcol_1half]
 [/ezcol_1half] [ezcol_1half_end]
 [/ezcol_1half_end]
I am quite loving all the poetic and moody photos you are sharing these days.
Very well written and all those moody shots are beautiful
Amazing recipe. i love your blog. i like your recipes. thanks for sharing,