
I had two kati roll posts last year. If you saw my old posts you can see I was trying to make food quickly rather than authentic. This time I decided to make the famous ‘kati roll’ from scratch and it’s genuine and tastes a lot better. But occasionally we do not have the time and look for quick, easy options. Here and here are my two old posts.

If you are from Kolkata or India, I am sure you know what a kati roll is. But I have readers who are not that familiar with the Indian cuisine. For them I Googled the history of the kati roll.
This street food originated in Kolkata. It was nothing but a wrap filled with kebabs. Over the years, like with any other food, different variations were invented. Today, any Indian flatbread wrap is called a kati roll. As I mentioned below, the best place to try kati roll is at Nizam (Kolkata) because it originated from there. There are several sayings about it’s origin. Some say it started to appease the office commutes as a quick and portable lunch. Some say Brits did not want to touch the kebabs, so they liked to wrap it. But who cares how it started. It tastes great no matter what. Once Nizam ruled the kati roll world of Kolkata but these days there are so many roll centers to try.
Why is it called kati? Wikipedia says that Nizam used to grill the meat on skewers. Initially, they started with iron skewers but due to ease of use later they changed to bamboo skewers. In Bengali those bamboo skewers are known as “kati” and that’s how this name came about.
Source: Wikipedia
In every part of Kolkata you can find a ‘roll corner’ where they sell a roll of every kind. You can find a decent size roll within 50-60 rupees. In Kolkata, there are so many famous eateries that sell rolls but I was never allowed to eat out much. My friend Somnath Roy Choudhuri (the best food guide) suggested apart from Nizam Badshah, Campari are also great to try.
Eating in those famous roll corners were not very common to my family, but there were several roll corners in every locality. Thankfully, there were a couple where I lived. I was not allowed to eat there often because food in India is not always prepared clean. So chances of getting an upset stomach from there were very high.
This is the reason ma used to make kati roll at home. It was more of an appetizer than street food to us. Mostly, she packed it for my lunch at school. Sometimes she prepared it for evening snacks with a hot cup of tea. It was very easy to make (for her), so any uninvited guests got a chance to taste my ma’s roll when they visited our home. Oh no, do not try that with me – I need a weeks notice if someone is coming to my home for a “roll” party.
Making bread is important for kati roll recipe. Here, in the States, I tried making Tortilla before. It’s easy but it’s nowhere close to the Kolkata one, so I strongly recommend making bread for the rolls, and if I can make it, so can you!! I marinated the chicken and paneer, prepared egg chicken kati roll (non-veg) and paneer kati roll (veg). Sometimes ma used to mince goat meat herself and make “keema” as filling for the rolls. If you want, I can get the minced meat filling recipe from her as well. The meat version tastes the best but chicken and paneer easily takes second place.
Recipe for Kati Roll
Bread
- 200 grams all-purpose flour
- 100 gram whole-wheat flour
- 1/4 teaspoon sugar
- 1/4 teaspoon salt
- 1 tablespoon unsalted butter, softened (or vegetable oil)
- 3/4 cup water or more
- 1/2 cup whole-wheat flour – for rolling
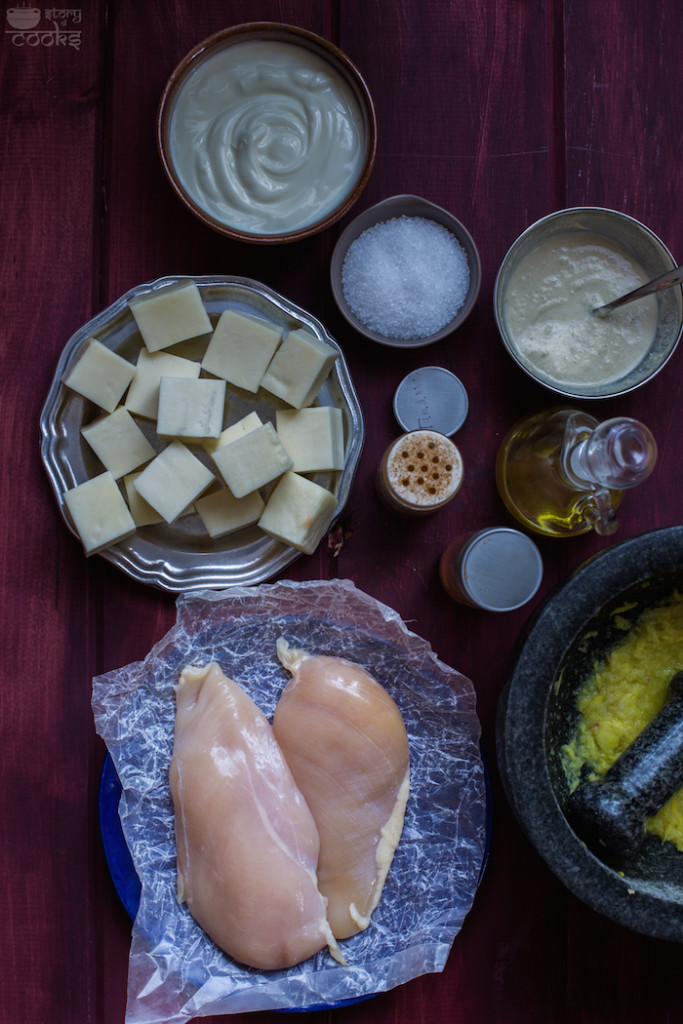
Chicken and Paneer Marination
- 1 piece (2 inches) fresh ginger
- 6 garlic cloves
- 1 tablespoon cashew (broken) pieces
- 1 tablespoon melon seeds
- 2 teaspoons tandoori masala
- 2 teaspoon chile powder
- 1 teaspoon garam masala
- 1/4 cup (100 gram) plain Greek yogurt
- salt to taste
- 2 tablespoons vegetable oil
- 1 teaspoon amchur powder – for paneer only
- 1 boneless skinless chicken breast, cut into 1-inch square pieces
- 7 oz (1 cup) paneer, cut into 1-inch pieces
Wrap
- 4 eggs
- salt and pepper powder
- 8 tablespoons vegetable oil
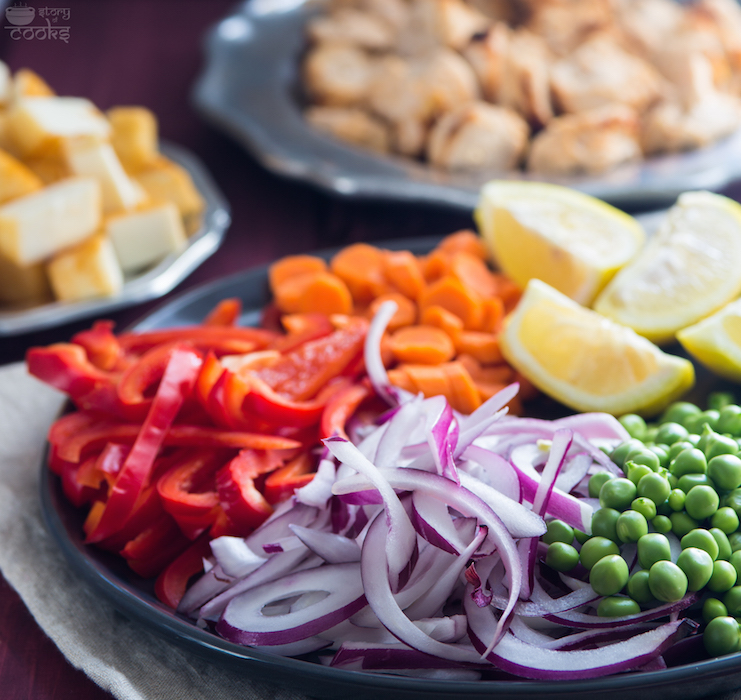
- 1 red onion, thinly sliced
- 1 green chile, seeded and finely chopped
- 1 tablespoon cilantro, finely chopped
- Juice of 1 lemon
- salt to taste
- 1 red or green bell pepper, deseeded, julienned – for paneer only
- 1 carrot, peeled and finely shredded – for paneer only
- 1 piece (1/2 inch) fresh ginger, finely chopped – for paneer only
Instructions
Bread:
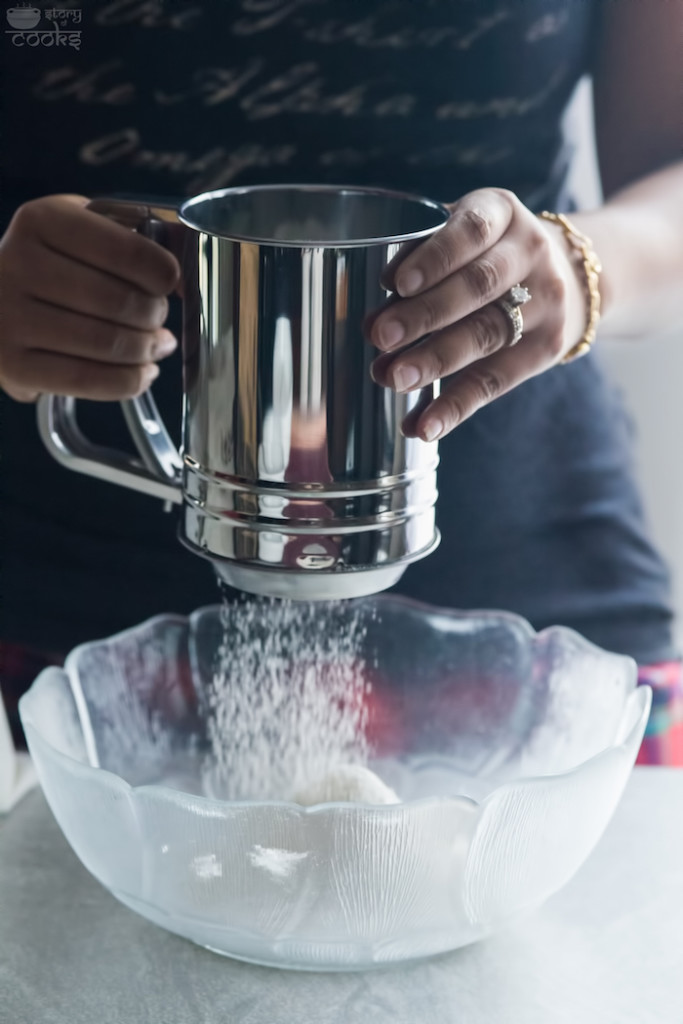
1. In a bowl, add all-purpose flour, whole-wheat flour, sugar, salt. With an egg whisker, mix it well. I prefer to whisk, but ma never does that. She always mix with egg-whisker. Add softened butter and salt.
I microwave refrigerated butter for 30 seconds before adding. You can add vegetable oil for the healthier option.
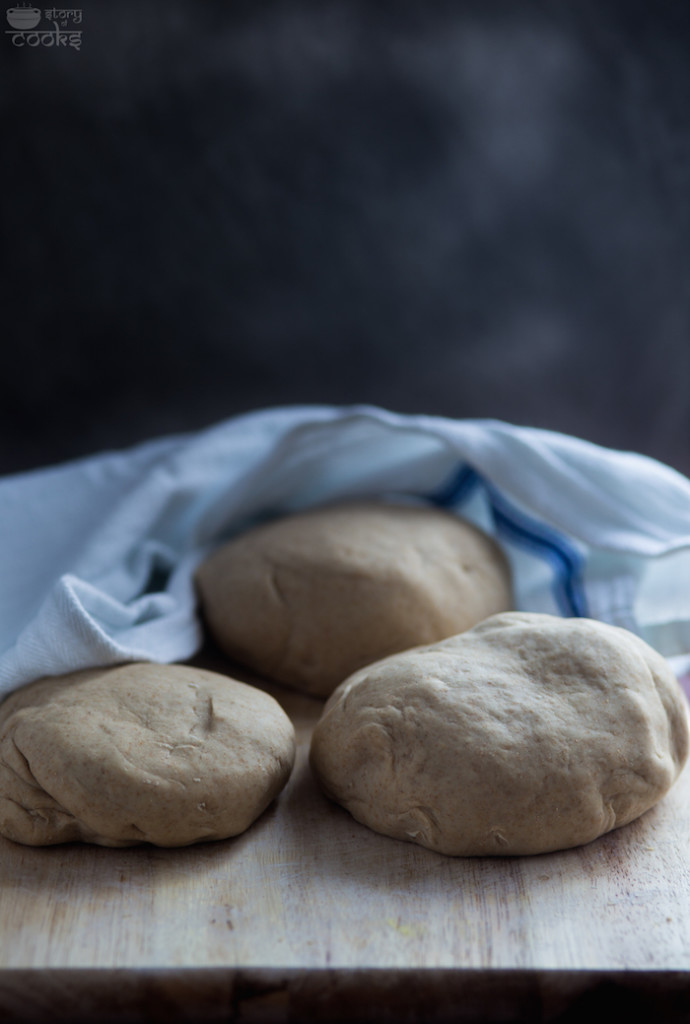
2. Slowly add water and with hands form a dough. I have used my KitchenAid stand mixer. Once it forms the dough take it aside. Put the dough in a bowl, cover with a cling wrap and keep it in a refrigerator until you prepare the rest. Ma suggests to keep it 2 hours in refrigerator.
Chicken and Paneer Marination:
1. In a food processor, add ginger and garlic. Work it until smooth. Take it aside in a medium-size mixing bowl. Wash the food processor, add cashew and melon seeds. Work it until ground. Add 1 tablespoon water to make a fine paste. Take it aside in the same mixing bowl.
2. Add tandoori masala, chile powder, garam masala, greek yogurt, salt, and oil. With a spoon mix it well. Divide that into two. In one, add amchur powder and mix it well. Spread this marination mix over paneer cubes. With hands mix it well. Cover with a cling wrap and marinate for 30 minutes.
3. Spread the other marination mix(without amchur one) over chicken pieces. With hands mix it well. Cover with a cling wrap and marinate for 30 minutes.
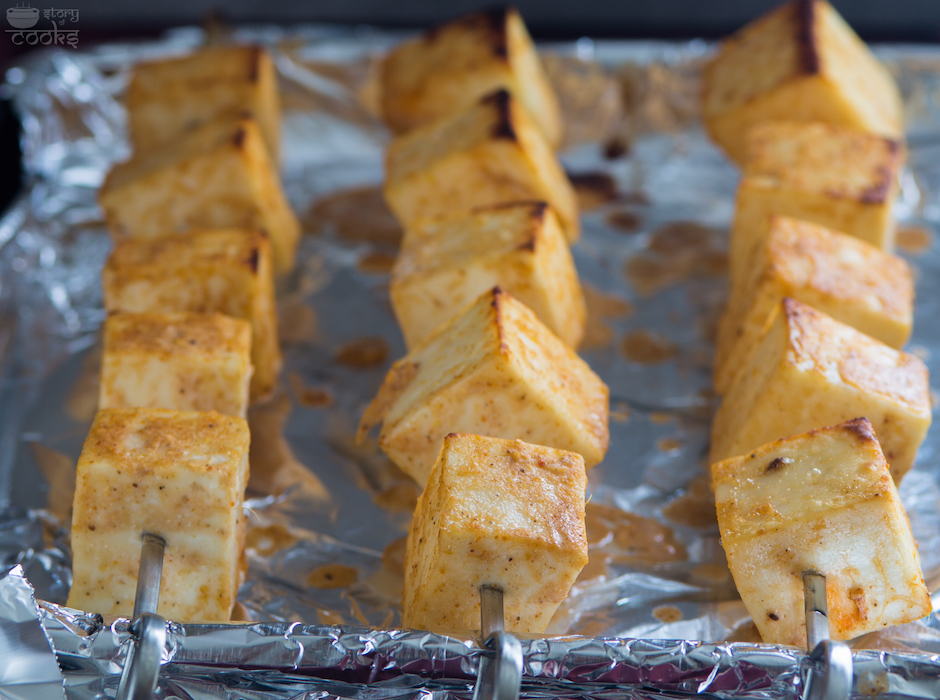
4. Slide the chicken pieces and paneer pieces into metal skewers. Set in a broiler pan. For Chicken: Broil for 7 to 8 minutes on one side. Take it out and turn it over. Broil for another 7 to 8 minutes, or until chicken is cooked through.
For Paneer: Broil for 5 to 6 minutes on one side. Take it out and turn it over. Broil for another 5 to 6 minutes, or until chicken is cooked through.
Wrap:
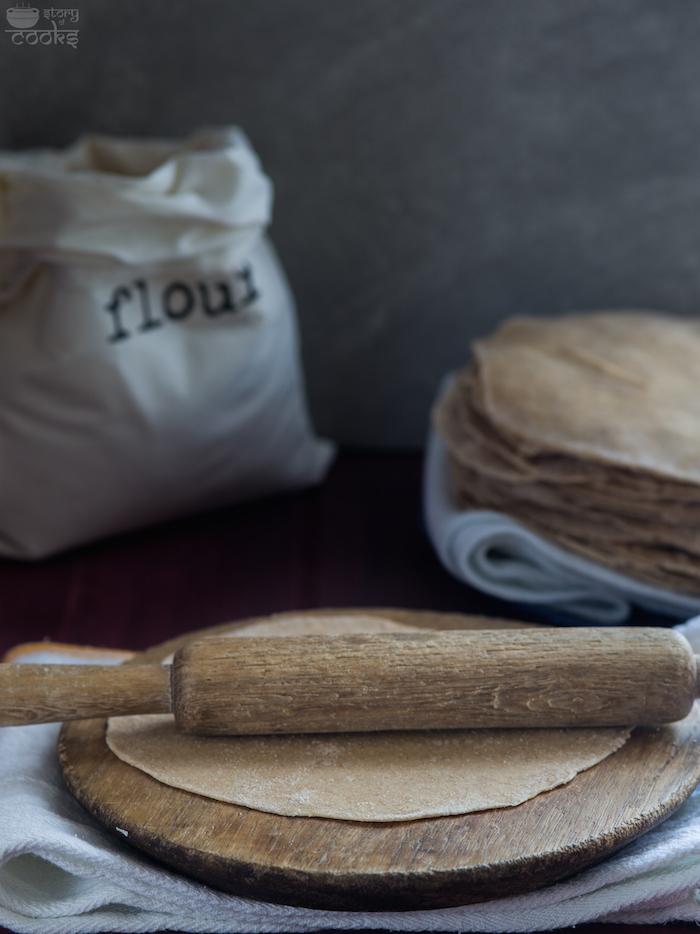
1. Meanwhile, chicken is getting marinated take some piece out of that dough to form a ball. You should be able to make 12 balls. Flatten each ball to form a thin round flat bread.
2. In a bowl, break the eggs, Add salt and pepper. Stir to mix it well.
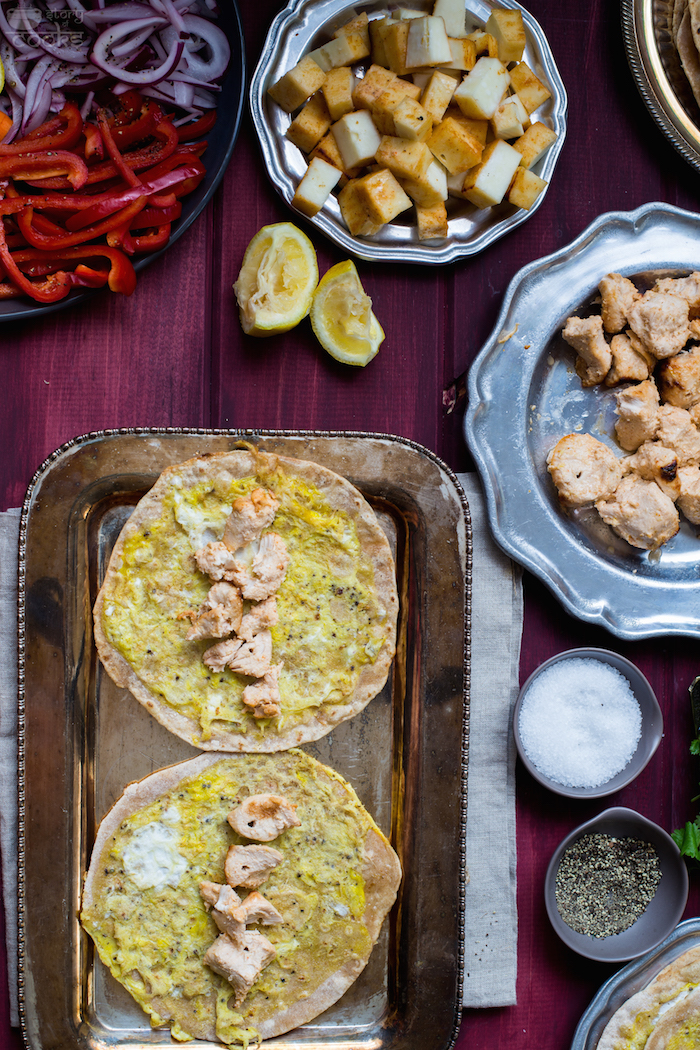
3. In a non-stick skillet, over medium-high heat, heat 1 teaspoon vegetable oil. Add 1 tablespoon of egg mixture and cook it for 1 to 2 minutes, or until it settles a bit. Add flatbread on top of it and cook it for 2 to 3 minutes, or until eggs adhere to it. Carefully flip it over and cook the other side for 2 to 3 minutes, or until golden brown. Add 1/2 teaspoon more oil if needed. Repeat the same procedure until you finish half of the flatbreads.
If you’re making vegetarian rolls, do not add eggs and follow this.
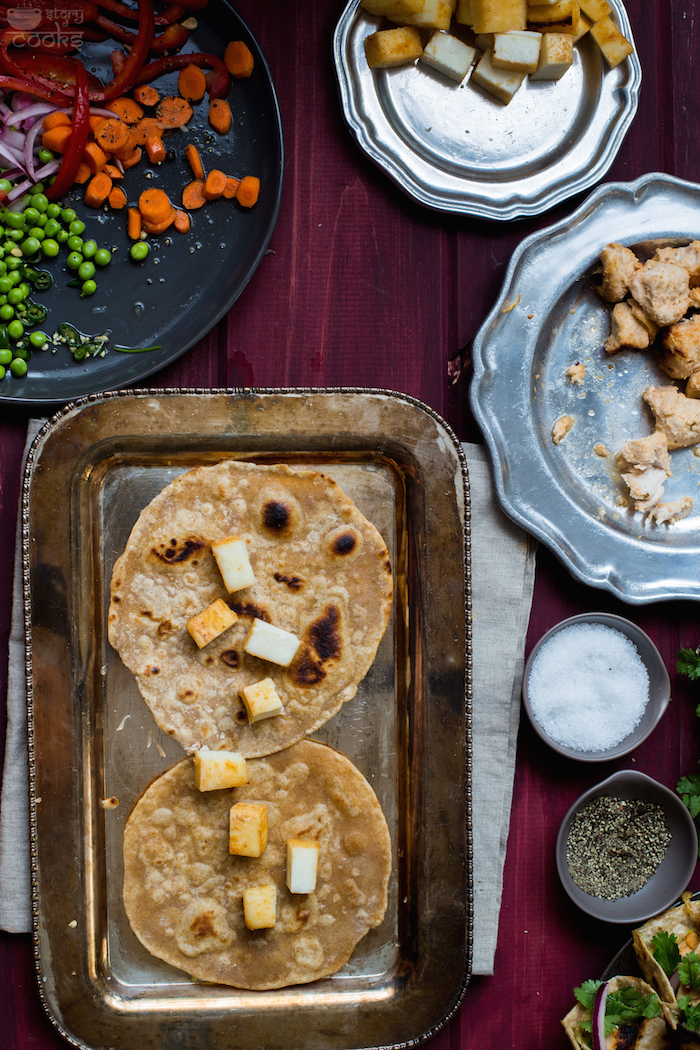
In a non-stick skillet, over medium-high heat, heat 1 teaspoon vegetable oil. Add one flat bread one at a time. Cook it for 4 to 5 minutes, or until its golden brown. Add 1/2 more teaspoon oil, turn it over and fry the other side.
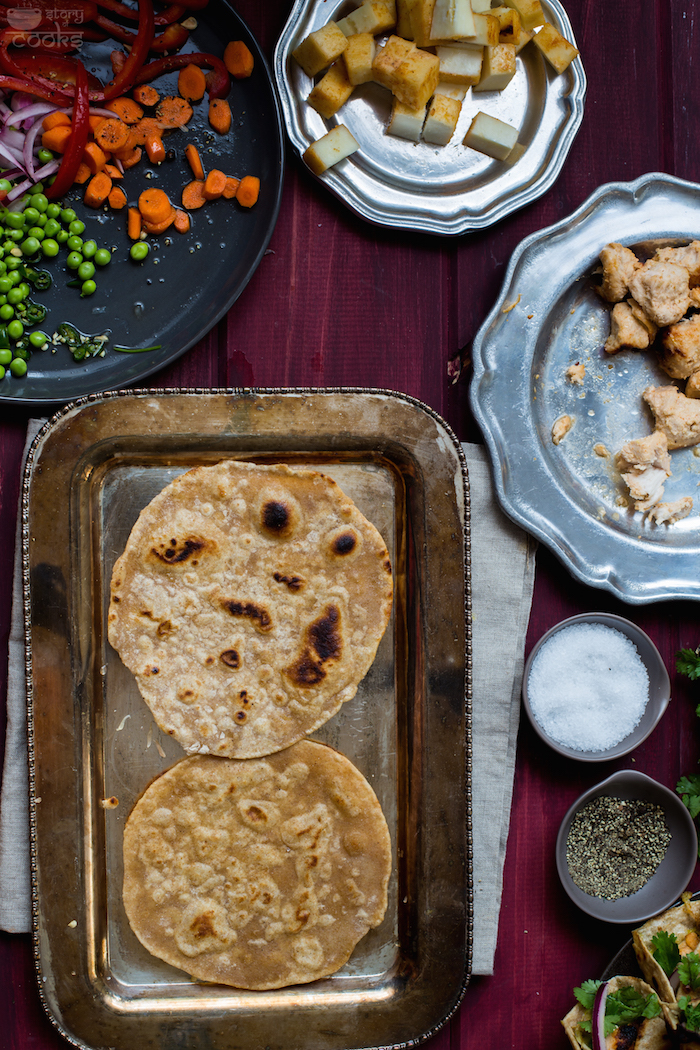
Take the breads aside, for assembly.
If want to store some bread for busy weekdays: Over medium-high heat, heat a skillet. Toast one side of bread for 2 to 3 minutes. Flip it over and toast the other side for 2 to 3 minutes. Cool it down and store it in a ziplock bag in refrigerator up to 1 week.
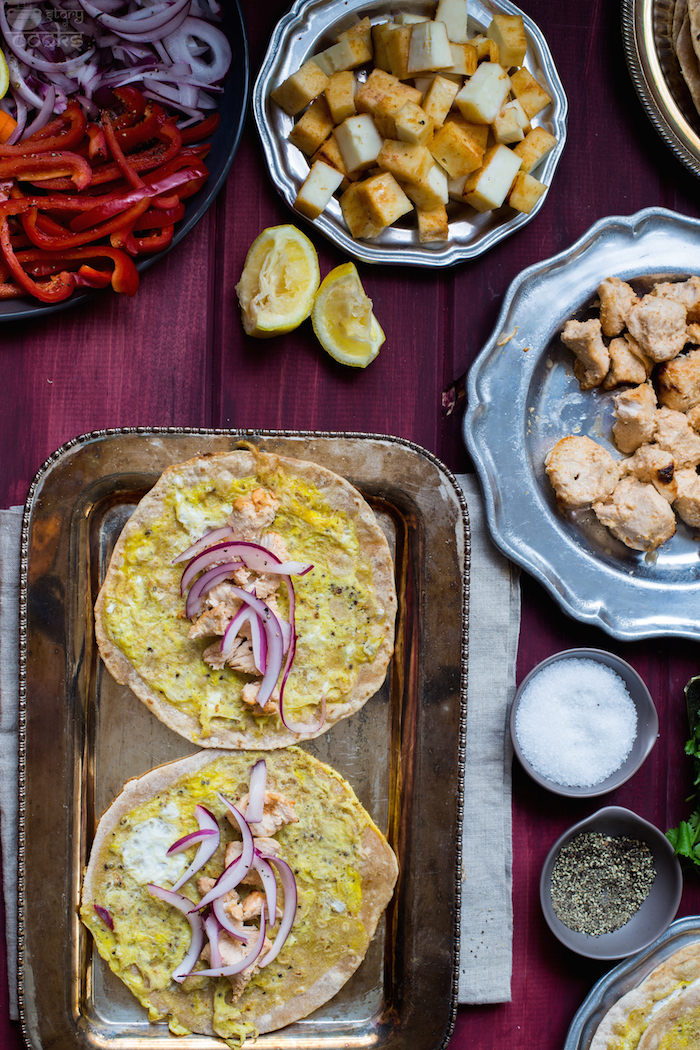
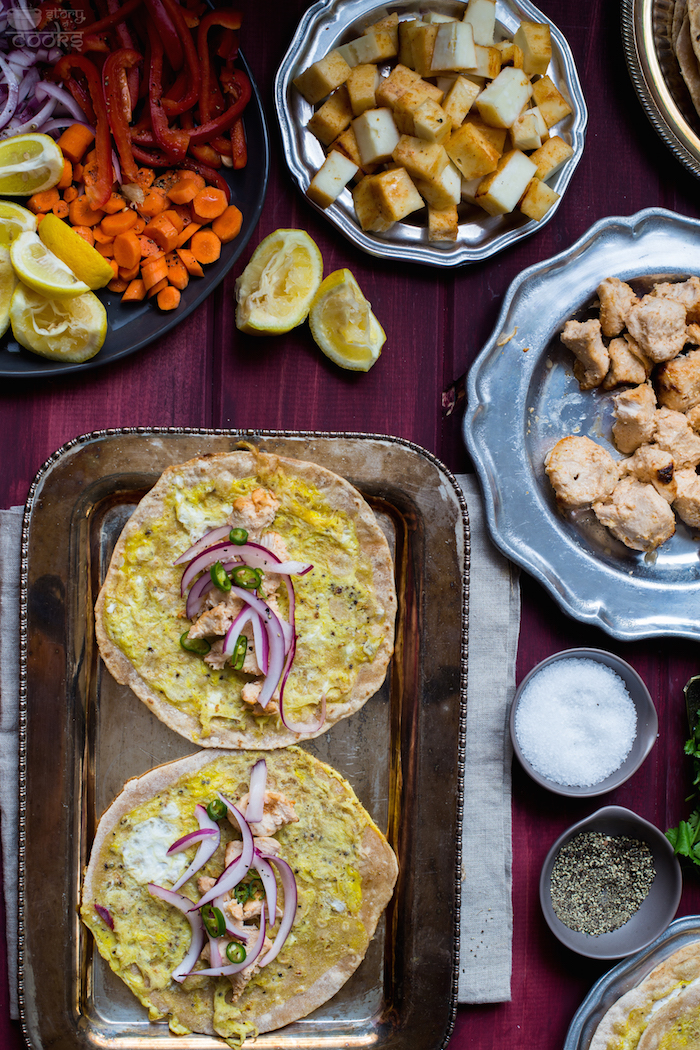
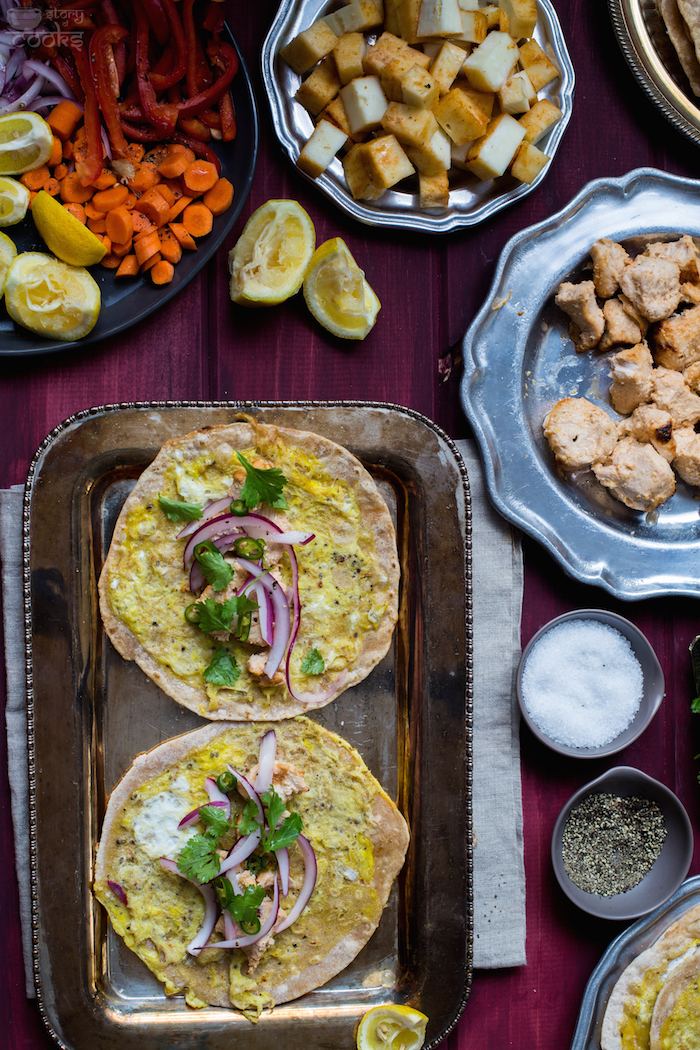
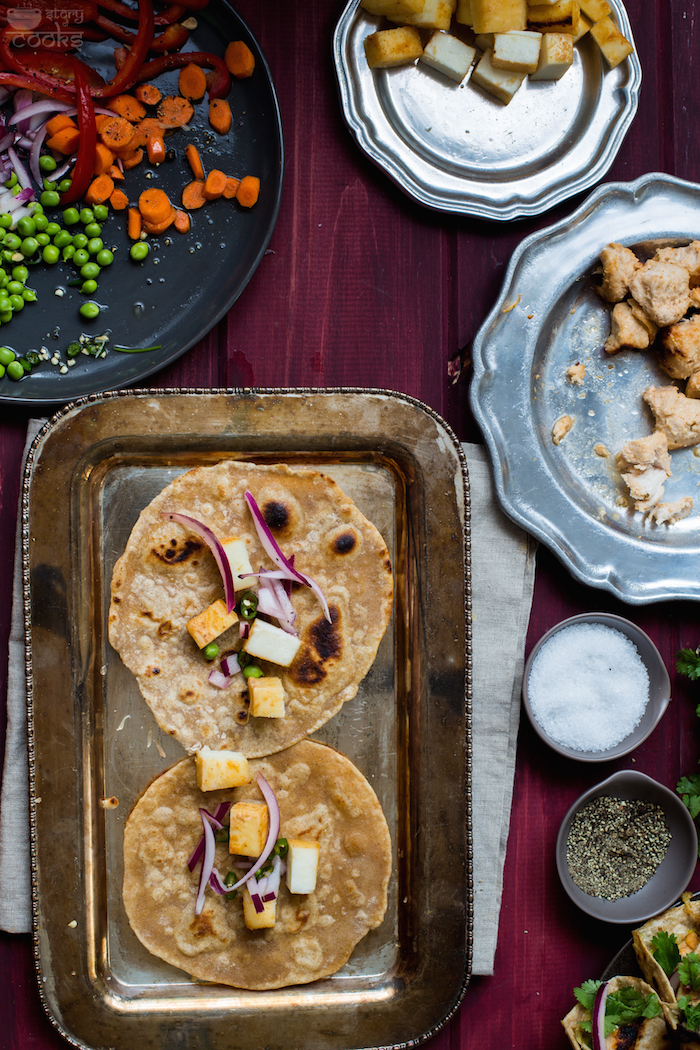
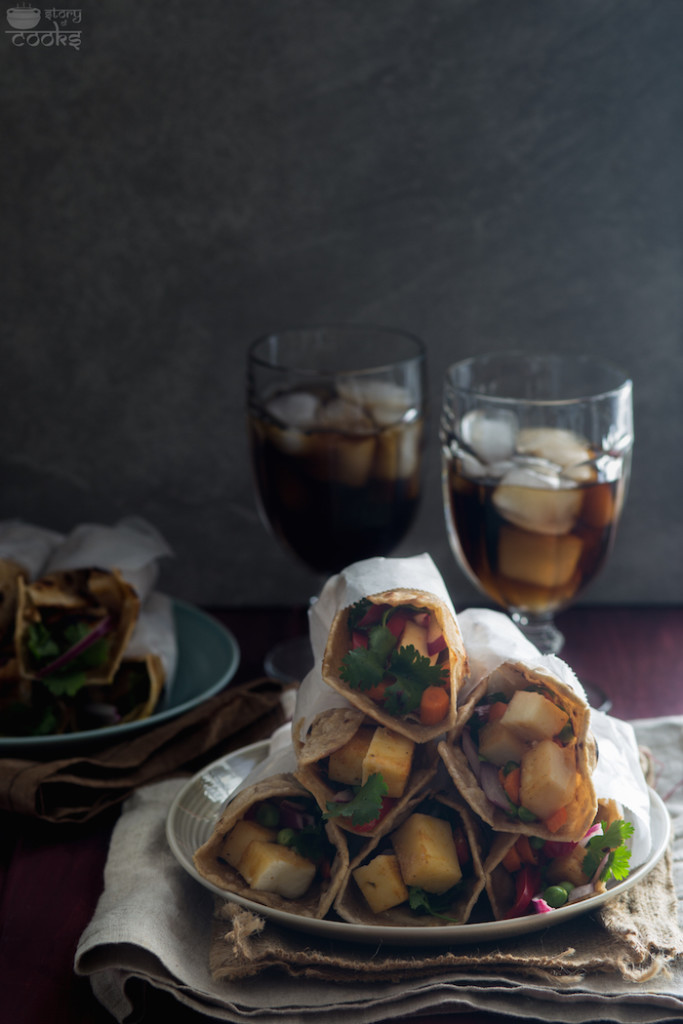
4. Non-Veg Kati Roll: In each egg-wrapped bread piece, add onion slices, green chiles, broiled chicken pieces, and cilantro. Sprinkle some lemon juice, salt and wrap it well with a deli paper.
Veg Kati Roll: In each bread piece, add onion slices, green chiles, broiled paneer pieces, bell pepper pieces, carrot pieces, cilantro, and fresh ginger.Sprinkle some lemon juice, salt and wrap it well with a deli paper.
Please follow the photographs above.
5. Sprinkle some lemon juice inside each wrap. Serve hot with chai.
Love kati roll. Looking at your pics i’m craving for some rolls now.. 😀
Beautiful rolls Dolphia. Looks really filling. I must say there is no substitute to homemade ones. Love how u have done each and every step so neatly, I learn better visually.
Brits..phew! they can’t touch anything but our riches he hee.
Am a kati roll addict. Nothing can match this satisfying mouth watering quick snack. thank you for sharing this article.