
Pizza!! The word itself excites us from age 5 to 50, right?
When we were growing up, eating, pizza was not common at all. I had my first pizza at Dominos in Kolkata when I was 20. Now I hear my friends’ kids demanding pizza from the age of 5. We never made pizza at home because my mom does not have an oven. It was always a special treat for me until I was 25.
When I came to The States life changed a lot.
In between preparing for semester exams and working on projects or assignments I had no other option other than eating pizza from the cafeteria. I especially remember the night before project deadlines. My friends and I would work together in a group and get a couple of pizzas from Papa John’s, which is why I gained 15 pounds in 3 months.
Since coming to Boston, I ate pizza only 3 or 4 times. I do not like putting tons of cheese on a pizza and ruining the taste. My husband says that I would like the way they make it in Italy because it has less cheese than American kind, and their crust is “super” thin. I am excited to find out when we visit.

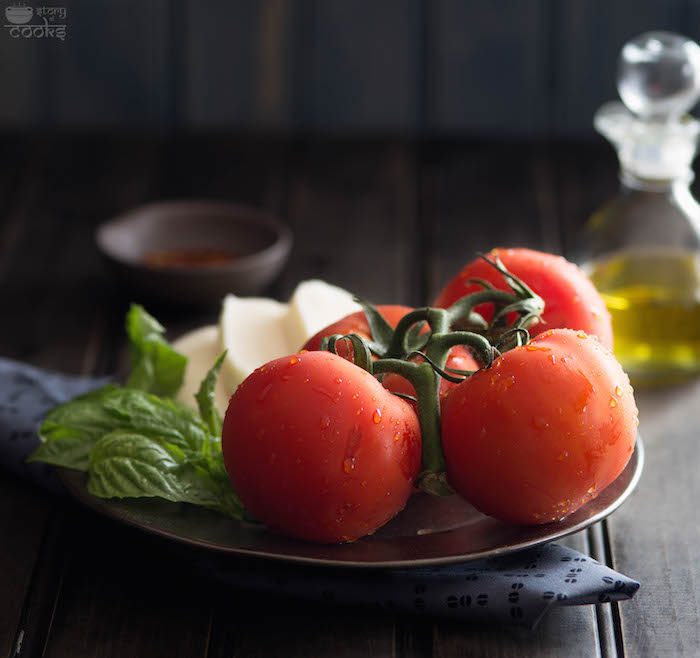
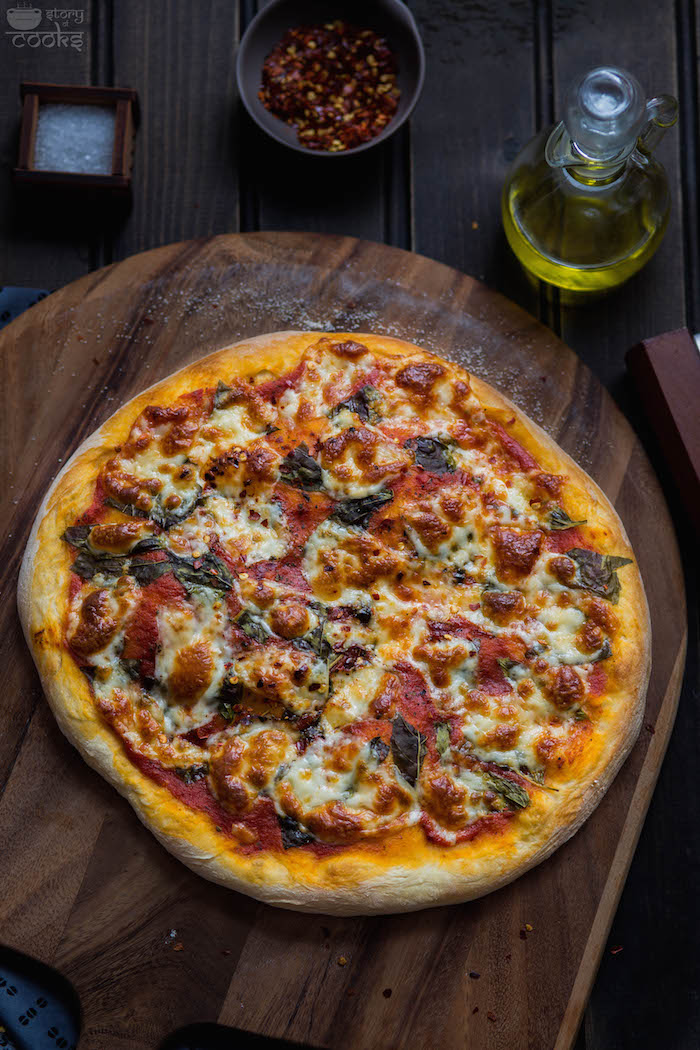
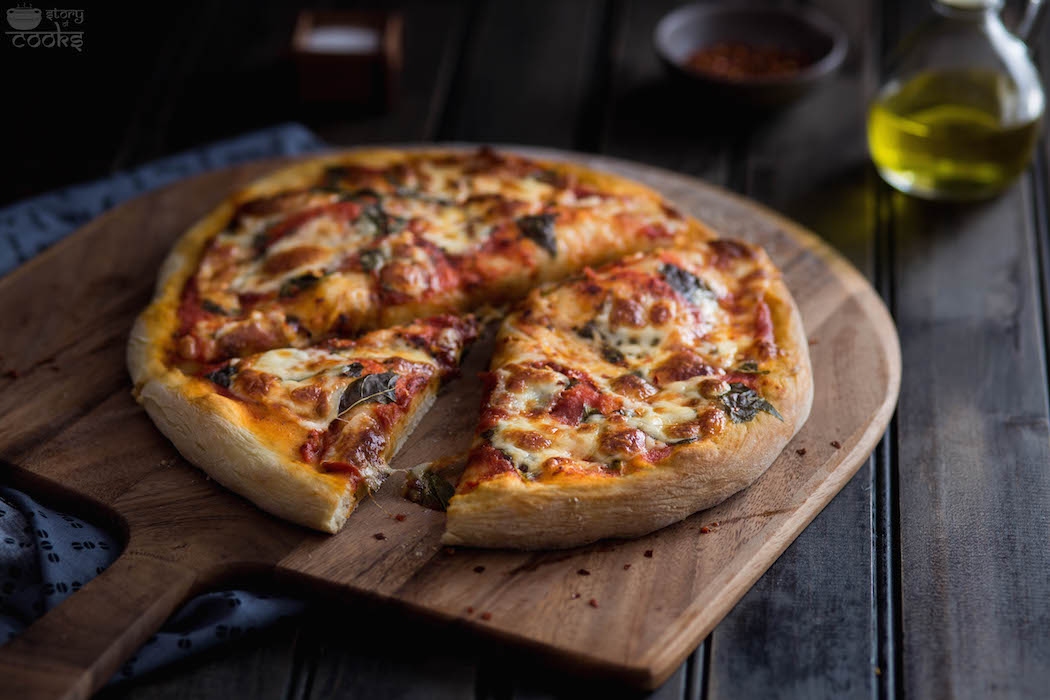
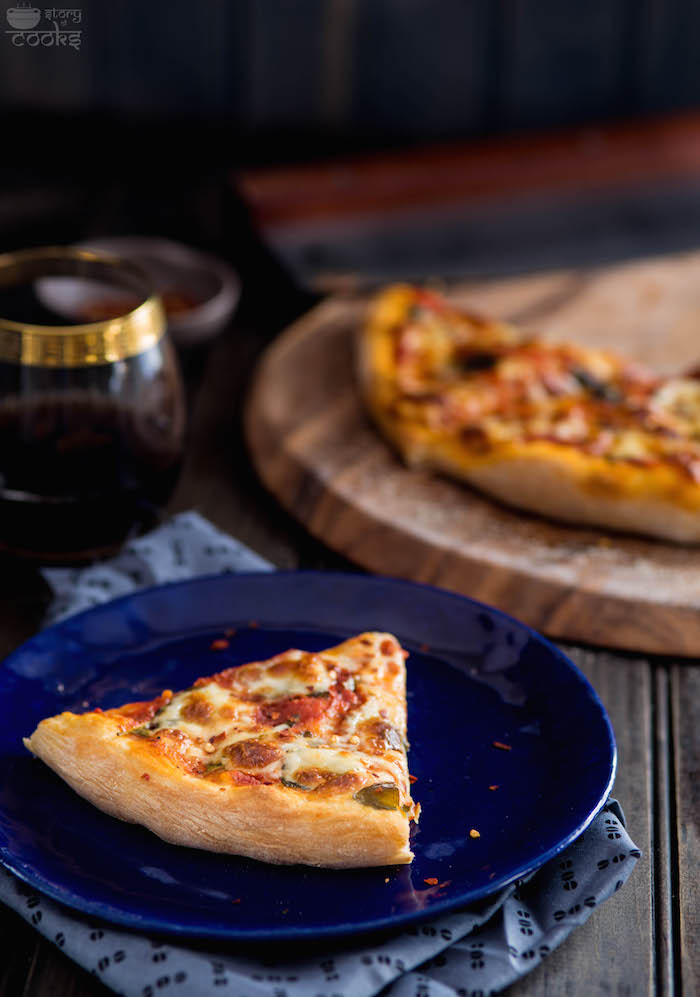
This week, I decided to make a pizza for the two of us. Every time I uttered the word pizza my husband wondered if I am feeling okay. When I chose to make pizza, I concluded not to use fancy toppings. I love my pizza fresh and pure. My pizza should have only fresh tomatoes, basil, and mozzarella. That is it – I am a purist when it comes to certain foods.
I was unaware that, this basic pizza is famously known as ‘Pizza Margherita’. In 1861, Umberto, I, from the house of Savoy become the king of Naples and visited the city. Chef Raffaele Esposito presented a pizza to his wife, queen Margherita. The pizza was topped with the colors of the unified Italian flag – red tomatoes, white mozzarella, and green basil. This is how pizza Margherita was born. Like the cuisine of other countries, pizza differs from one region to another in Italy. In Naples, the crust is a lot thicker than that of the rest of Italy. Neapolitan style Pizza is also a lot more generous in its toppings than other types in Italy.
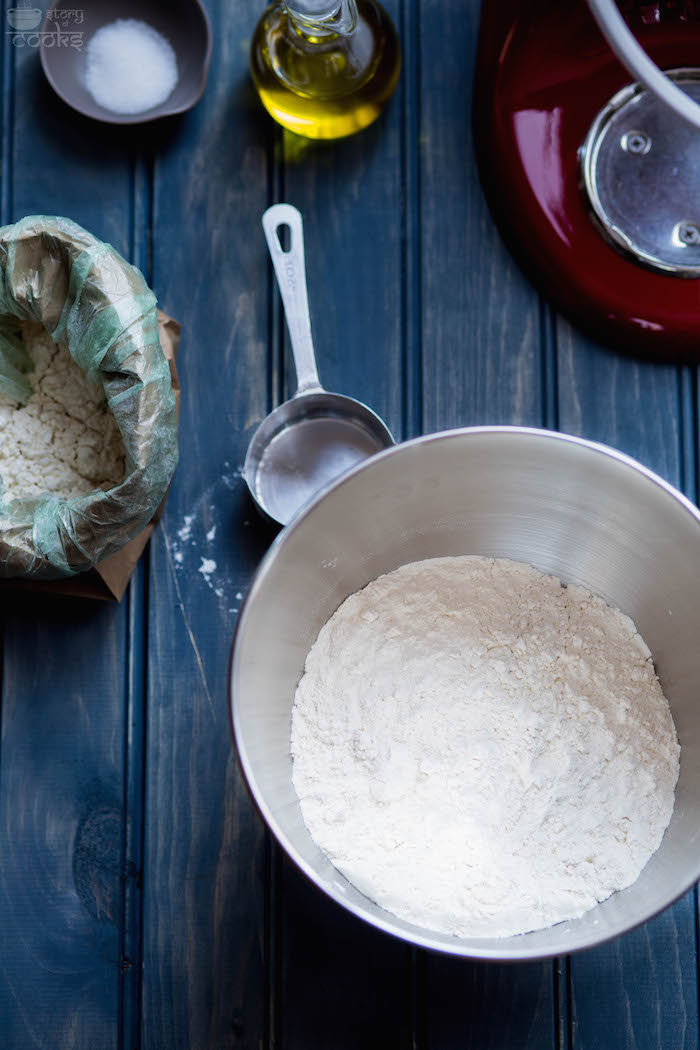
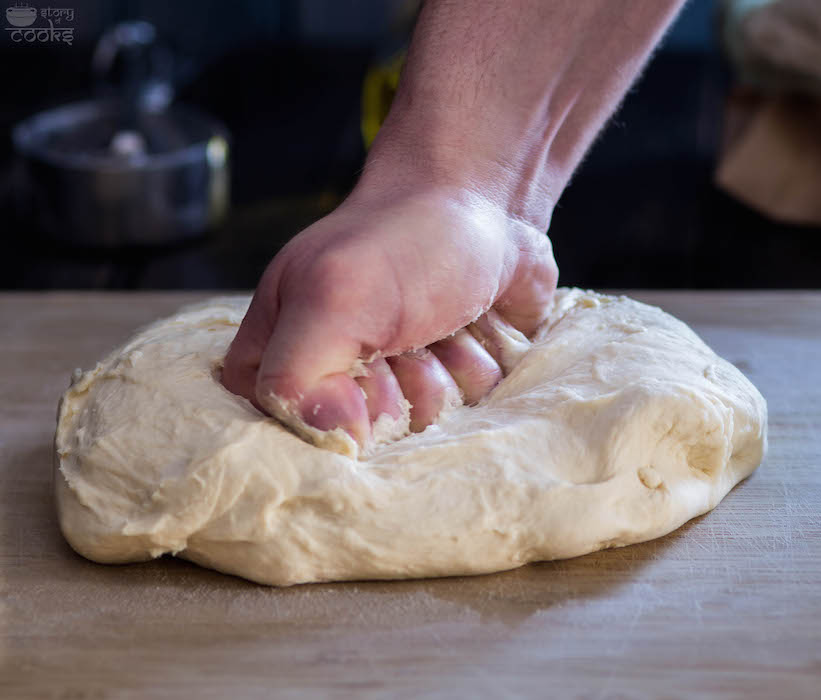
We were gifted a stand mixer for our wedding so rather than buying the pizza base from a store, I decided to make it at home. If you do not have a stand mixer, do not panic. Just knead the dough well (beat the crap out of it) with your hands, it’s good exercise :smile:. After reading through a bunch of blog posts and a couple of Italian cookbooks, I purchased a some items from Amazon.
I only used all-purpose flour to make the pizza base. In general, pizzas are baked in a industrial size \ or brick oven. Temperature is a lot higher in them than our regular oven. So in a domestic oven, turn the heat to 500F and heat the oven for at least 30 minutes. Every nook and corner of your oven should be very very hot. Put the baking sheet upside down(it will give you a flat surface) or pizza stone inside the oven. This will help your pizza bottom to be crisp.

This recipe, video and “The Italian Cooking Course“(A book which I got from my work) have helped me a lot to prepare this pizza. And oh yes, my husband was the biggest and main support behind this pizza madness.

Notes:
I tried mixing bread and all-purpose flour together. The pizza was much more dough-y. If you like Napoli style pizza, you can mix half bread flour and half all-purpose flour.
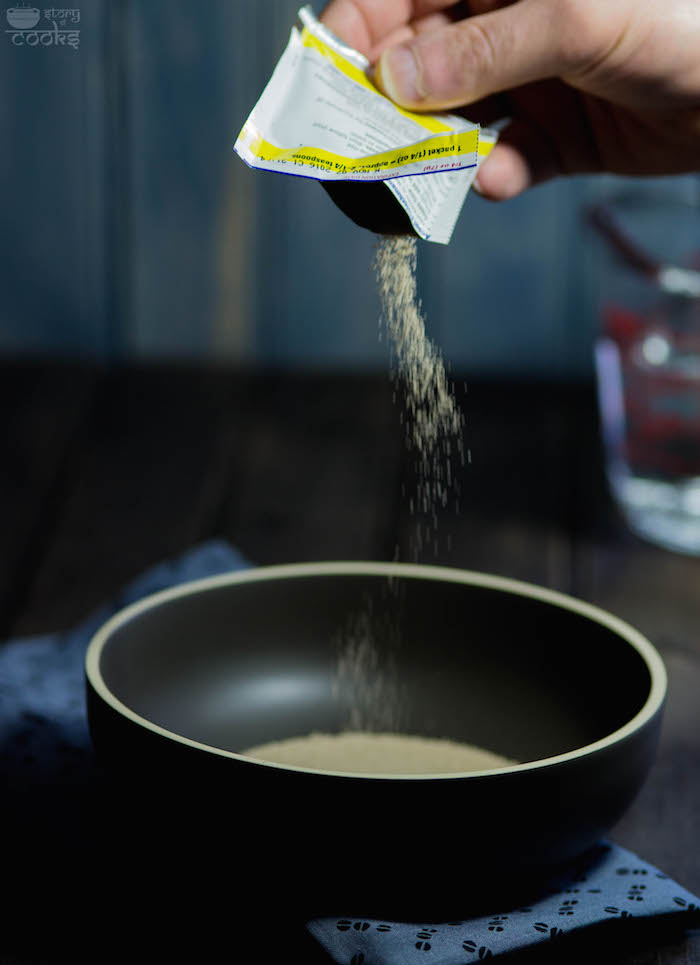
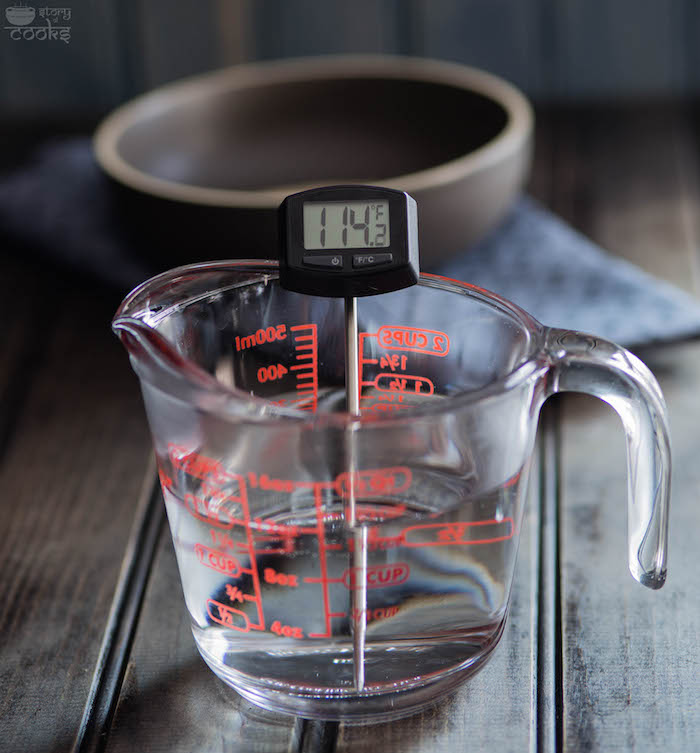
Water temperature is very much crucial to dissolve yeast. Make sure your water is not too hot and over 120F. Luke warm water(105-115F) water is perfect for dissolving yeast. If your yeast does not dissolve and have a foamy mixture after 5 minutes, it’s dead.
I have used one Fleischmann’s Yeast, Active, Dry, 0.75-Ounce Packet.
You can prepare the pizza dough a night before and let it rise slowly in your refrigerator. You can also store pizza dough and use it later. Wrap it airtight and store in a refrigerator up to few days and deep freezer up to 3 months. You can also store the prepared pizza in an airtight container in the refrigerator for a couple of days.
Ingredients
- Pizza Dough
- 1 packet yeast
- 1 1/3 cup warm water (105-115F)
- 3 1/2 cups + 1/2 cup (for dusting) all-purpose flour
- 1 teaspoon sugar
- 1 tablespoon salt
- 2 tablespoons + 1/2 teaspoons olive oil
- 1 teaspoon semolina flour
- Pizza sauce
- 1 (28-oz.) can whole peeled tomatoes, packed in purée
- salt to taste
- 1 teaspoon oregano
- 1 teaspoon olive oil
- Toppings
- 1/2 teaspoon olive oil
- 4 oz whole milk mozzarella, sliced into 1/2 inch thick pieces
- 7-8 basil leaves
Instructions
1. In a bowl add yeast and warm water. Stir it to mix it well. Let it rest for 5 minutes or until it’s foamy. If it’s not it’s dead and start with a new one.
2. In a mixing bowl add all-purpose flour, sugar, salt and olive oil. Stir to mix it well.
3. Add yeast water and mix it with a rubber spatula and hand until it comes together. Once mixed, knead it for 10 minutes. Add more flour if needed.
(Stand mixer Notes: In a bowl add yeast and warm water. Stir it to mix it well. Let it rest for 5 minutes, or until it’s foamy. Meanwhile, in a stand mixer bowl add all-purpose flour, sugar, salt and olive oil. Run with a dough hook on low speed for 30 seconds. Add yeast water on low speed with the dough hook. Once mixed, run on medium-low speed for 10 – 12 minutes. Add more flour if needed.)
4. Poke your dough, if it bounces back you are done! Otherwise, continue to knead more.
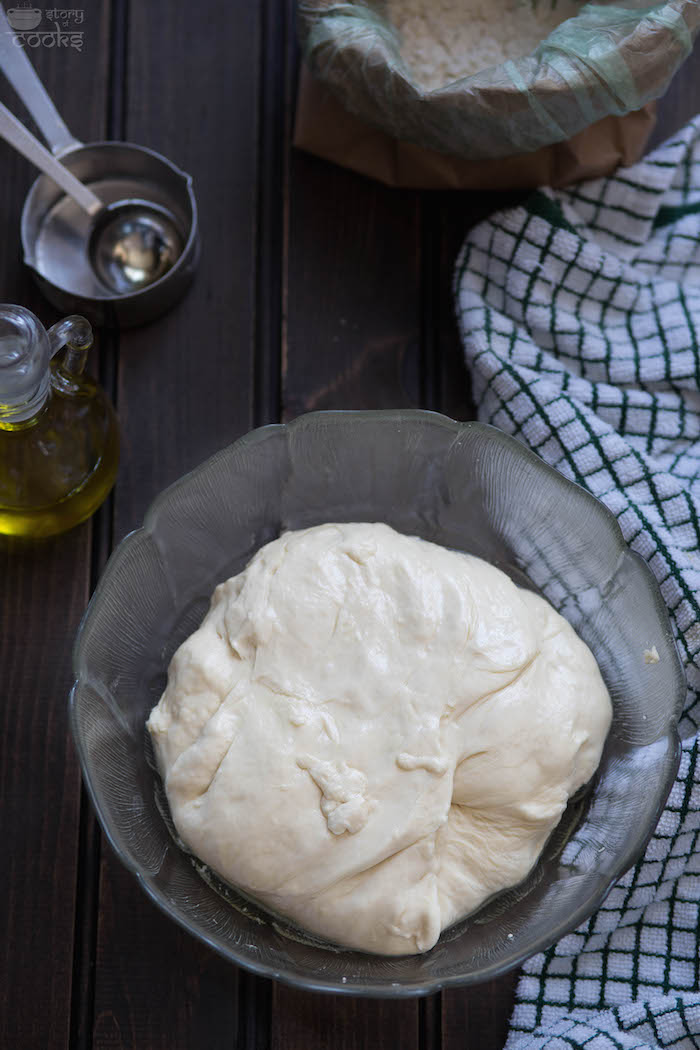
5. Shape the dough like a ball and place it in a bowl greased with 1/2 teaspoon olive oil. Cover with a cling wrap and keep it in a warm temperature.
If you’re in a warm country, you do not have to worry about it. I followed Sallys Baking tips for making a warm temperature:
“For the warm environment, I heat up my oven to 200F. Then, I turn the oven off and keep the door slightly ajar. This will be a warm environment for your dough to rise. After about 30 minutes, I close the oven door to trap warmish air inside with the rising dough.”
6. While the dough was rising, I prepared my pizza sauce. In a food processor, add tomatoes in the puree. Work it until smooth. Transfer it to a bowl. Add salt, oregano, olive oil. Stir to mix it well.
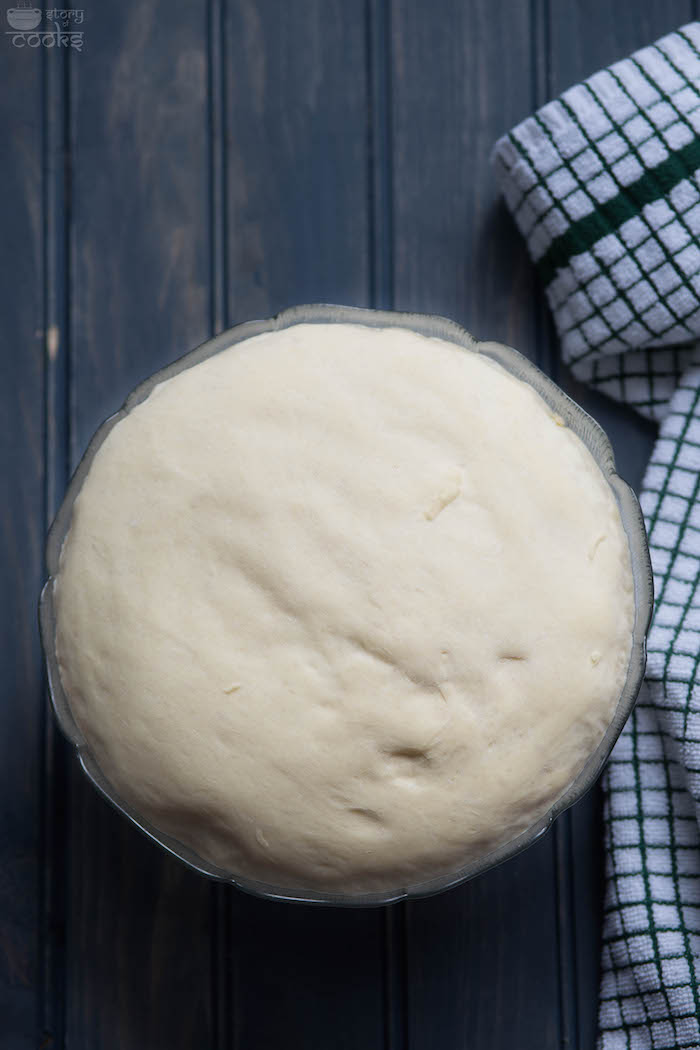
7. After 2 hours, your dough should be double in size. Press the dough to let the air get out. Cut it into two pieces. Shape it like a ball. If you are freezing, store them now.
8. Preheat oven to 500F. Heat the oven for at least 30 minutes with the pizza stone or baking sheet (upside down) inside.
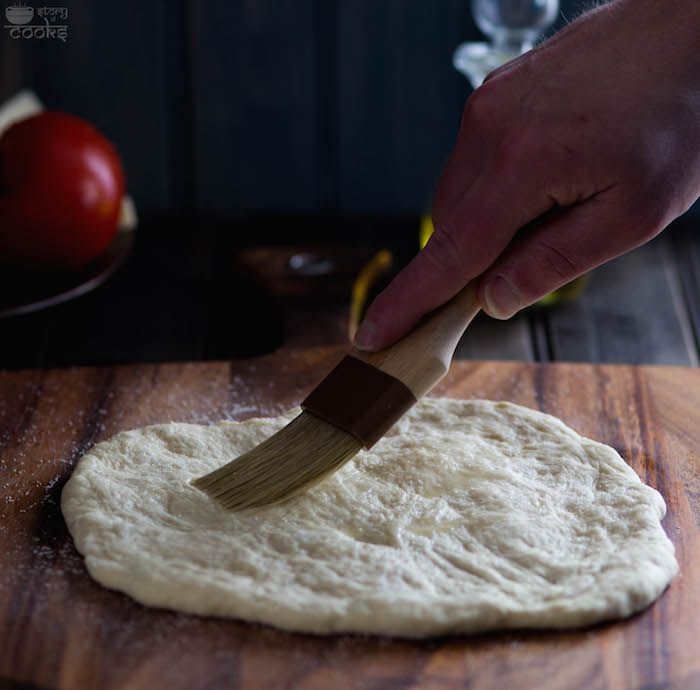
9. Flatten each ball of dough, working one at a time on a lightly floured surface with a rolling pin or by stretching with your fingertips. Dust pizza peel or a thin chopping board with semolina flour. When the dough is rolled out to your desired thickness, transfer it on the chopping board or the peel.
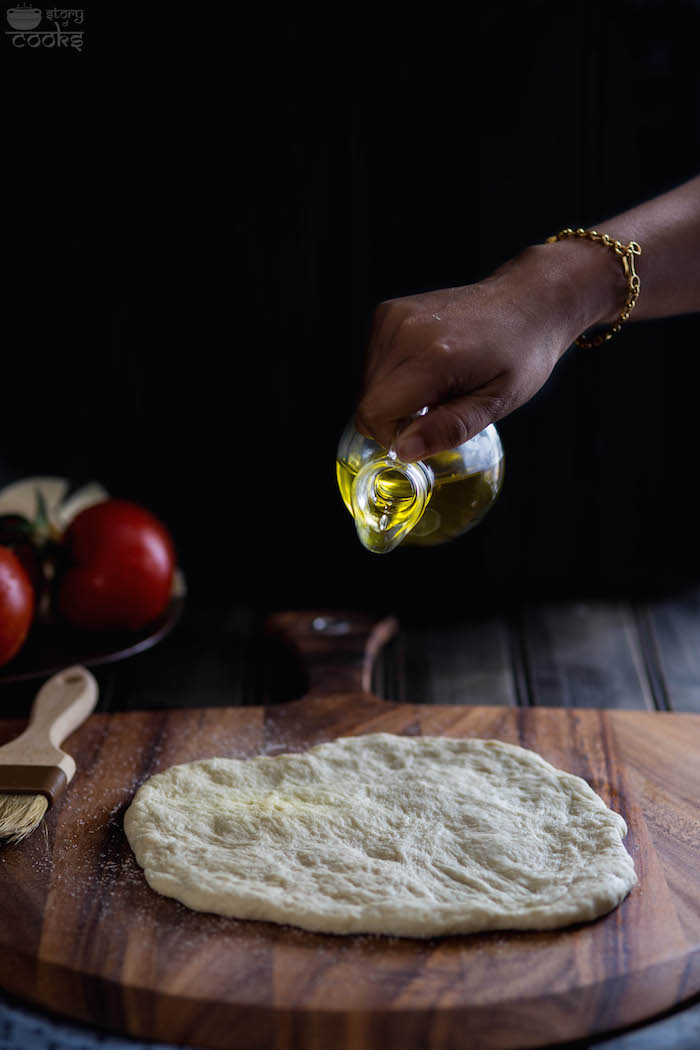
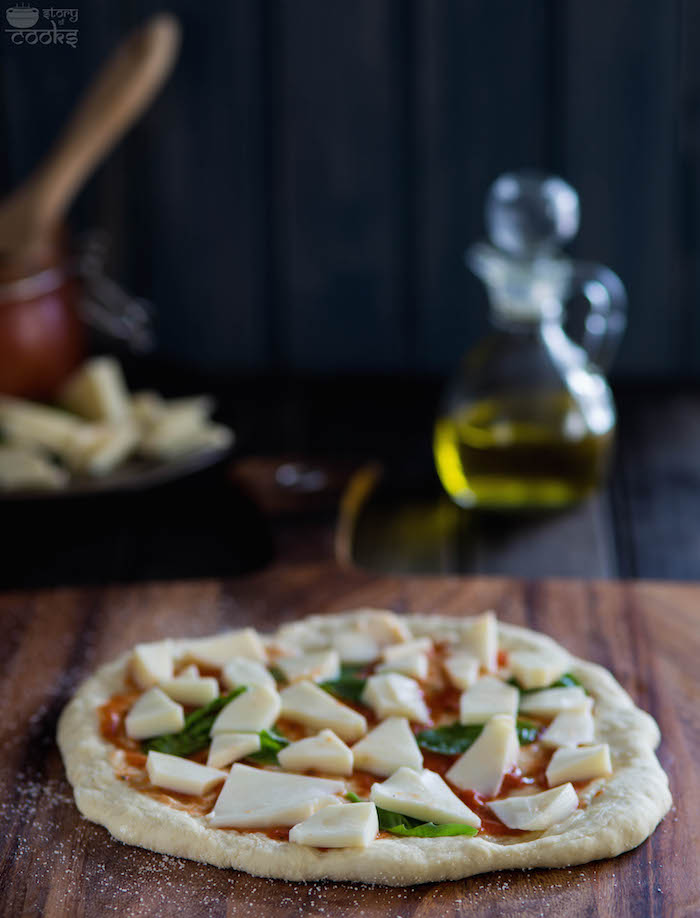
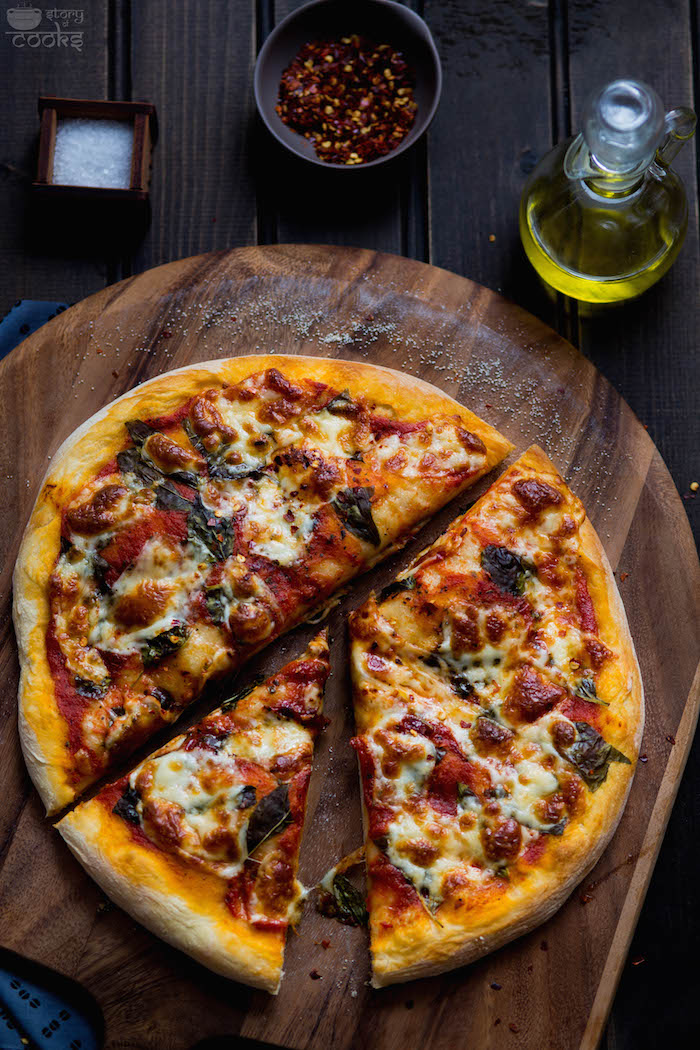
10. Brush the top with 1/2 teaspoon olive oil. Spoon some pizza sauce on it and spread well with a brush. Add mozzarella and basil on top of it. Now slide it carefully onto the pizza stone or upside down baking sheet. Bake for 15 to 16 minutes or until the crust is lightly browned. Garnish with crushed red pepper and serve warm.


Loved reading through this post as always and the pictures… My God …. amazing ! Keep rocking !
Thank you dear! <3
Beautiful joint venture 🙂 Love the way you and your spouse’s hands are synchronizing in the Pizza making process.
Rocking shots!
Hugs <3
Love you dear!!
Perfect, beautiful and extremely mouthwatering!
Wonderful clicks that make me hungry.
Cheers,
Rosa
Comment from a legend like you mean a lot to me! 🙂 Thank you Rosa
Your post and your clicks are simply superb!!! My daughter saw the pictures and asked me to make a pizza just like yours. I think I will be trying this recipe of yours very soon!!
Thank you 🙂